SSOGEN / Add a SAML application in SSOGEN
SSOGEN
Add a SAML application in SSOGEN
Only the name, two addresses and the way a person is recognized change, so these SSOGEN screens serve every SAML application you add.
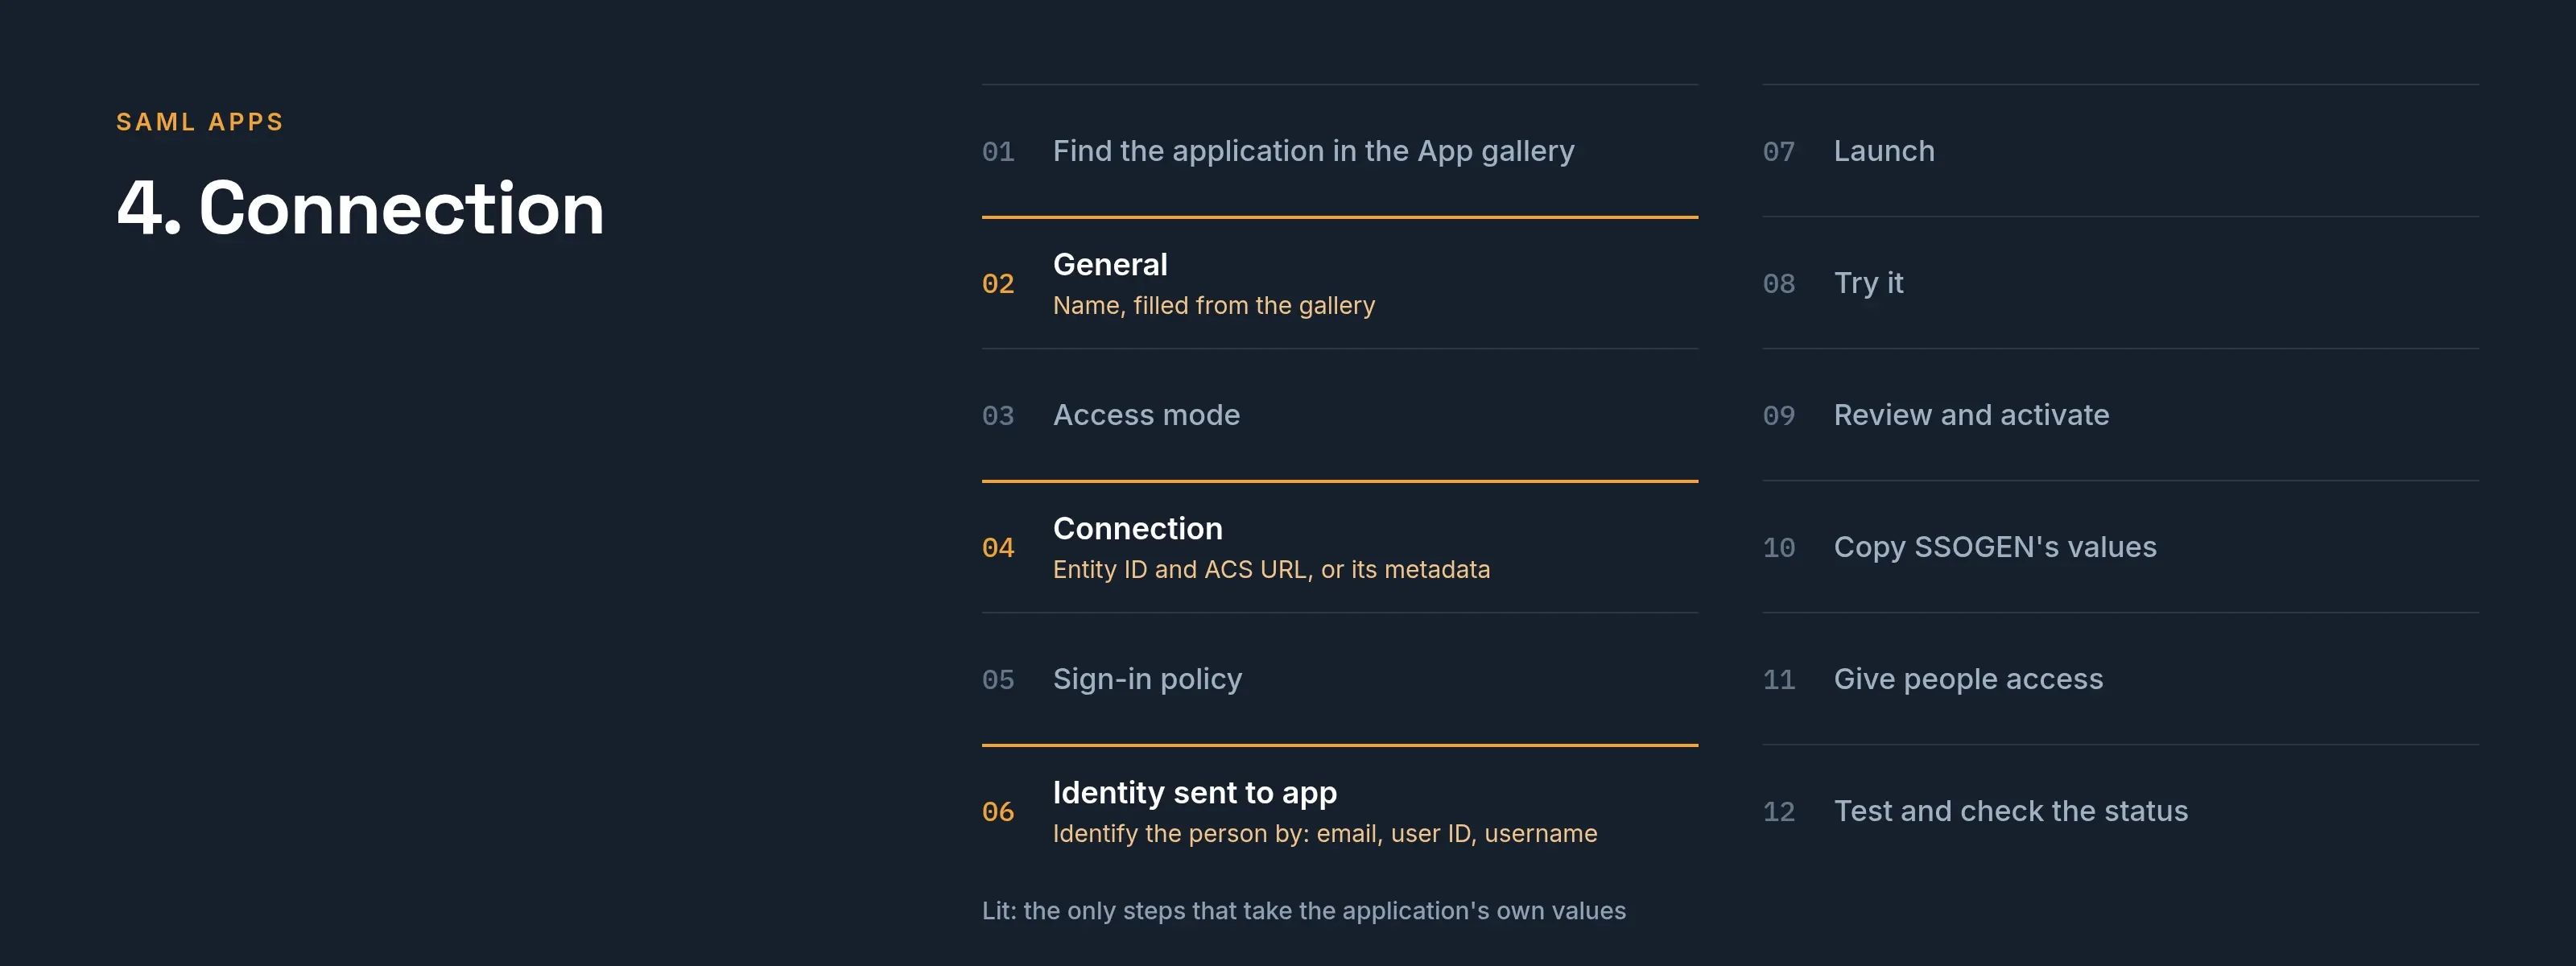
The examples use the made-up company Acme, with SSOGEN at https://acme.ssogen.ai, email addresses at acme.example and the test person Emily Johnson (emily.johnson@acme.example). The console always shows your real address; copy values from the console, not from this page.
The application’s own settings are on its page in the application guides, for example ServiceNow or Workday. The reference documentation describes the same wizard in Register a SAML application.
What you need
- An administrator role that can save SAML settings. Super admin can do every step. An Application admin also needs the Authentication admin role to save the SAML part, and a role that reads the directory (Directory admin, Read-only admin) to assign people and run the test.
- A sign-in policy. At least one policy under SSO policies > Policies, and either a default under SSO policies > Defaults or a policy you pick in the wizard. An application without a policy cannot be activated.
- From the application: its entity ID and its assertion consumer service (ACS) URL, or its SAML metadata as an
https://address or an XML file. The application page says where the application shows them. - The address where the application starts a sign-in. It becomes the launch URL of the tile in My Apps.
- The people and groups who will use the application, already in SSOGEN.
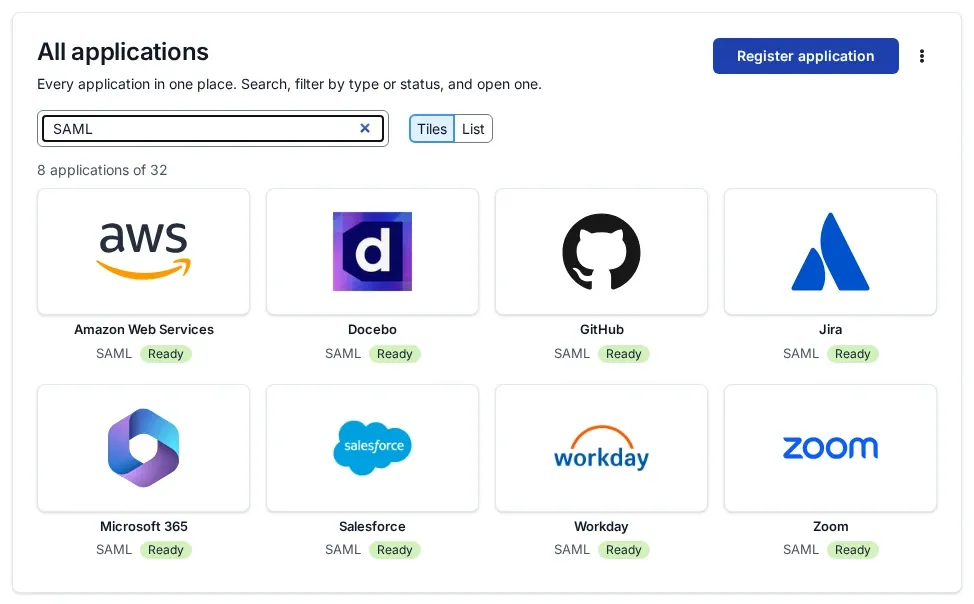
1. Find the application in the App gallery
- In the console open Applications > App gallery.
- Type the application’s name in the search box (“Search by name, vendor or keyword”) and select its card.
The Register application wizard opens with the application’s name, icon and protocol filled in. A card at the top links to the vendor’s own single sign-on guide.
If the application has no card, select the Custom SAML application tile under Custom app instead. The wizard is the same.
2. General
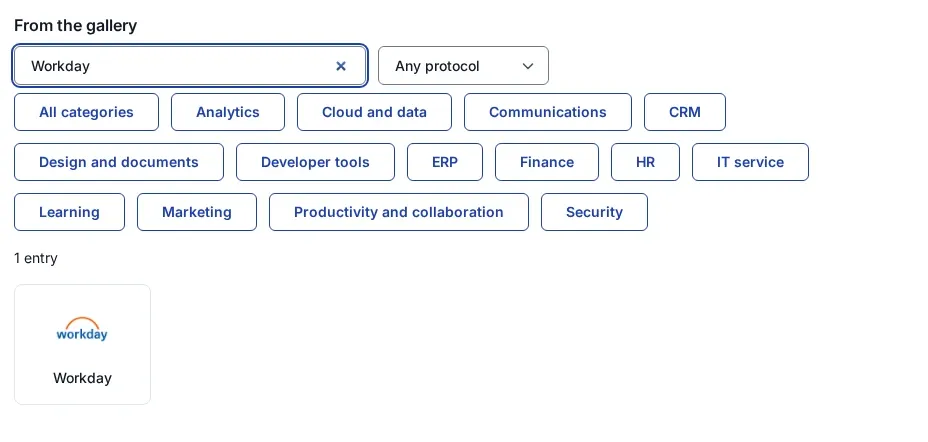
| Field | What to enter |
|---|---|
| Name | Filled in from the gallery. Change it if you run several instances, for example ServiceNow Production. People see this name in My Apps. |
| Slug | Follows the name. Lowercase letters, numbers and single hyphens. |
| Application ID | Follows the slug, for example app_servicenow. It cannot be changed later. |
| Category (optional) | Groups the tile in My Apps. Filled in from the gallery. |
| My Apps icon (required) | The gallery picture, or Upload an image (PNG, JPEG, GIF or SVG, up to 2 MB). |
Select Next.
3. Access mode
SAML is already selected. Select Next.
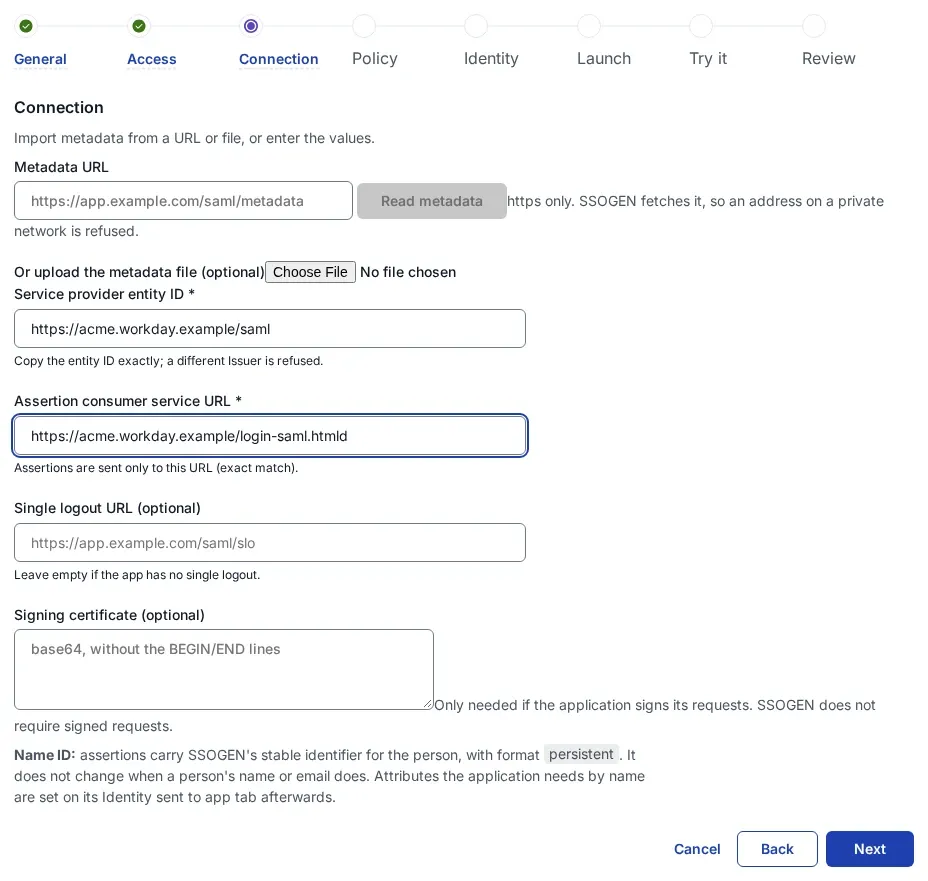
4. Connection
Give SSOGEN the application’s values in one of three ways.
- Read its metadata from an address. Paste the address in Metadata URL and select Read metadata. The address must use
https://and be reachable on the internet; an address on a private network is refused. Use the file upload for those. - Upload its metadata file. Use Or upload the metadata file (optional). The file can be up to 256 KiB.
- Type the values.
After reading metadata, the card Review what the metadata declares lists the entity ID, the ACS addresses, the logout address and the certificates. Where there are several ACS addresses, choose the one to use; only HTTP-POST addresses can be chosen. Select Use these values.
| Field | What to enter |
|---|---|
| Service provider entity ID | The application’s entity ID, copied exactly. SSOGEN compares it character by character with what the application sends; a trailing slash makes a different value. |
| Assertion consumer service URL | The application’s ACS URL, https:// only. SSOGEN sends assertions to this address and no other. |
| Single logout URL (optional) | Only if the application page asks for it. |
| Signing certificate (optional) | Leave empty unless the application page says otherwise. SSOGEN does not require signed requests. |
Select Next.
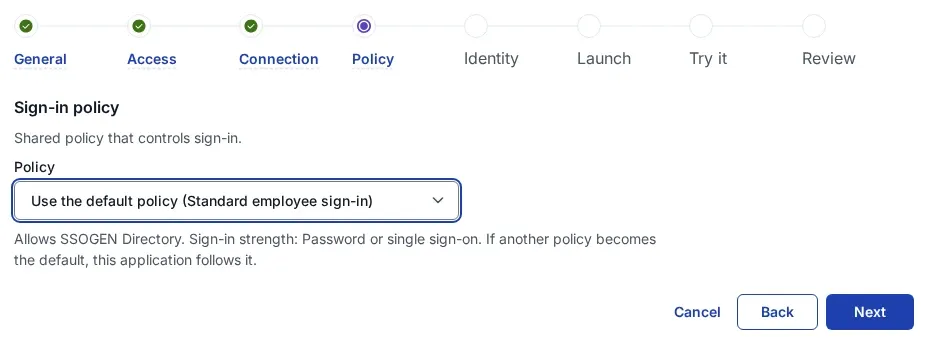
5. Sign-in policy
Keep Use the default policy, or choose the policy that should apply to this application. The line under the list shows which sign-in methods the policy allows and how strong the sign-in must be. Select Next.
6. Identity sent to app
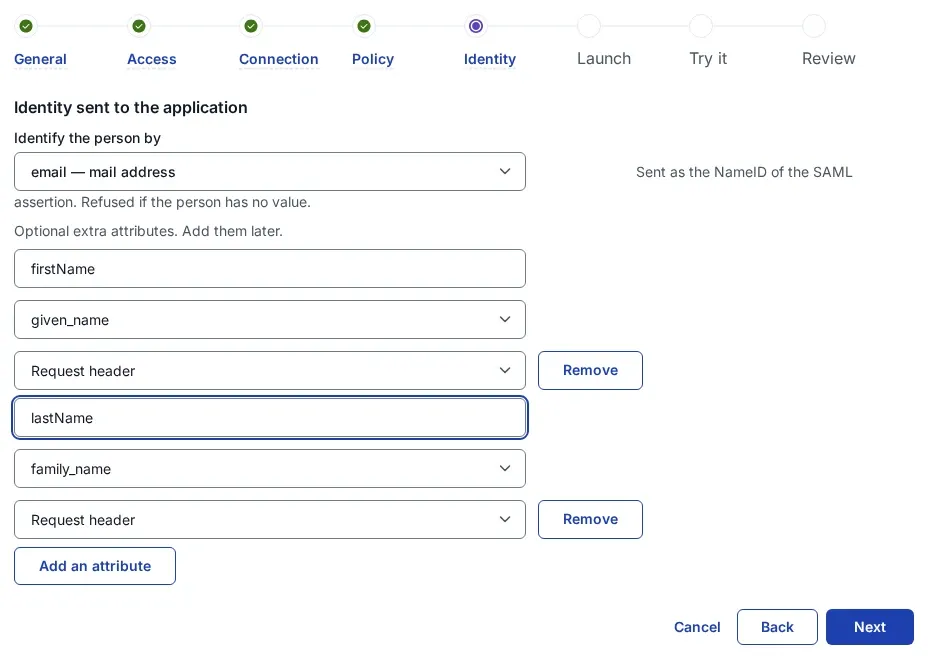
Identify the person by decides what SSOGEN puts in the name ID of the assertion. Choose the value the application matches its accounts on; the application page says which.
| Choice in SSOGEN | What the application receives | Name ID format |
|---|---|---|
| SSOGEN user ID, permanent (recommended) | An identifier that never changes for the person | urn:oasis:names:tc:SAML:2.0:nameid-format:persistent |
| email (mail address) | The person’s email address | urn:oasis:names:tc:SAML:1.1:nameid-format:emailAddress |
| username (the SSOGEN account name) | The SSOGEN sign-in name | urn:oasis:names:tc:SAML:1.1:nameid-format:unspecified |
| source_username, source_name, source_subject | The name or identifier from the directory or identity provider the person came from | urn:oasis:names:tc:SAML:1.1:nameid-format:unspecified |
| display_name, subject | The full name, or SSOGEN’s user ID | urn:oasis:names:tc:SAML:1.1:nameid-format:unspecified |
If an application asks in its sign-in request for a name ID format that the choice cannot give (for example it asks for emailAddress while the person is identified by the permanent SSOGEN user ID), SSOGEN answers with a SAML error instead of an assertion. Set the application to the format in the table, or to “unspecified”.
Extra attributes. Where the application reads attributes beside the name ID, select Add an attribute, type the attribute name exactly as the application expects it, and choose the SSOGEN value to send: email, display_name, username, given_name, family_name, groups, subject, or a source value. Leave the third control as it is. Attribute names use letters, digits, dots, hyphens and underscores, start with a letter or digit, and are up to 128 characters long. Attributes can also be added later on the application’s Identity sent to app tab.
Select Next.
7. Launch
Enter the Launch URL (https): the address at which the application starts a SAML sign-in. The application page gives it. A tile in My Apps opens this address; the application then sends the person to SSOGEN, and SSOGEN answers. Without a launch URL the application shows as Incomplete and its tile cannot be opened.
Select Next. SSOGEN saves the application at this step.
8. Try it (optional)
Choose a Person and select Run test. The card SAML assertion shows what the application would receive for that person: NameID, Audience (the application’s entity ID), Recipient (its ACS URL) and Attributes. Nothing is signed in. Select Next to go on with or without the test.
9. Review and activate
Check the list and select Activate application. The application’s page opens on its Assignments tab.
10. Copy the identity provider values from SSOGEN
Open the application’s Integration tab. The section SSOGEN as your identity provider holds everything the application asks for. Each row has a Copy button.
| The application asks for | Row in SSOGEN | Value for Acme |
|---|---|---|
| Identity provider metadata (address) | IdP metadata | https://acme.ssogen.ai/saml/idp/metadata |
| Identity provider metadata (file) | Download metadata | the file ssogen-idp-metadata.xml |
| Identity provider entity ID, issuer | IdP entity ID | https://acme.ssogen.ai/saml/idp |
| Sign-in URL, single sign-on URL | Single sign-on URL | https://acme.ssogen.ai/saml/idp/sso (HTTP-Redirect and HTTP-POST) |
| Logout URL | Single logout URL | https://acme.ssogen.ai/saml/idp/slo (HTTP-POST) |
| Signing certificate, as text without the BEGIN and END lines | Signing certificate, Copy | one line of base64 text |
| Signing certificate, as a file or with the BEGIN and END lines | Download certificate (PEM) | the file ssogen-idp-signing-certificate.pem; rename it to .cer or .crt if the application wants that extension |
The NameID format row always shows persistent. Give the application the format that follows from your choice in step 6.
These identity provider values are the same for every application on your SSOGEN address. Settings > Certificates shows the metadata address before any application exists, for an application that wants SSOGEN’s values first.
Certificate fingerprint and expiry date. Some applications ask for the fingerprint of the signing certificate instead of the certificate. Print it, and the expiry date, from the downloaded file:
openssl x509 -in ssogen-idp-signing-certificate.pem -noout -enddate -fingerprint -sha256Note the expiry date. An application that stored the certificate or its fingerprint needs the new one before the old one ends; an application that reads the metadata address picks it up when it refreshes.
What every application can rely on:
- SSOGEN signs every assertion with RSA-SHA256 and a SHA-256 digest, and puts its certificate in the signature. The outer response is not signed separately; where an application asks which part is signed, choose the assertion.
- Requests from the application need not be signed. SSOGEN reads requests sent by HTTP-Redirect (deflated, as the standard describes) and by HTTP-POST.
- The issuer of every assertion is the IdP entity ID. The audience is the application’s entity ID. The answer is posted only to the registered ACS URL, with the relay state the application sent, unchanged.
- An assertion is valid for five minutes.
- The sign-in starts at the application. SSOGEN answers the application’s sign-in request; it does not post an assertion that nobody asked for.
11. Give people access
On the application’s Assignments tab:
- Keep Assignment required on. Only the people and groups assigned below then see and open the application.
- Under Assign a person, search by name and select the person. Under Assign a group, do the same for a group. Groups are easier to keep right: joiners and leavers follow group membership.
Assign the person who will run the first sign-in before you finish the application’s side. Several applications run a real sign-in when you save their settings, and an unassigned person is refused.
12. Test and check the status
Select Test, choose a person and select Run test. The result says “{person} can open {application}.”, “{person} would be asked for a second factor.” or “{person} cannot open {application}.”, with every check. Compare NameID in the SAML assertion card with the value the application holds for that person.
The Overview tab shows the status:
| Status | What it means |
|---|---|
| Ready | The launch URL is set, someone is assigned and the application is active. |
| Unused | Nobody is assigned, so the tile appears on no one’s My Apps. |
| Incomplete | The launch URL is missing or not an https:// address, or the policy admits no sign-in method. The reason is shown beside the status. |
Change the values later
- Name ID and attributes: the application’s Identity sent to app tab, then Save.
- Launch URL: the Sign-in / launch tab, then Save.
- Policy: the Access rules tab. A change applies at once.
- Entity ID, ACS URL, logout URL, certificates: in the browser’s address bar replace the part after
/admin/with#/saml-apps, open the application’s registration on the SAML apps page and select Edit. Paste the certificates again when you edit: an empty certificate box removes the stored certificate.
What people see
The assigned person signs in at https://acme.ssogen.ai and lands on My Apps. The new tile appears the next time the page loads. Selecting it opens the application in a new tab on a desktop browser, or in the same tab on a phone. SSOGEN checks the assignment and the sign-in policy again at that moment and asks for a second factor first if the policy wants one. The application sends the browser to SSOGEN, SSOGEN answers without asking again, and the person is in.
Opening the application’s own address works the same way: the application sends the person to SSOGEN, which asks them to sign in if they have no session yet.
Troubleshooting on the SSOGEN side
| What appears | Cause |
|---|---|
| SSOGEN page “Sign-in refused” with “No service provider is registered here with that entity ID.” and the entity ID the application sent | The entity ID registered in step 4 differs from the one the application sends, often by a trailing slash or http against https. Correct it on the SAML apps page. |
| “You are not assigned to that application. Ask whoever administers it to assign you, or a group you belong to.” | The person is not assigned, directly or through a group. |
| “The authentication request could not be read, or was not valid.” | The application asked for an assertion consumer address that is not the registered ACS URL, or sent a request SSOGEN cannot read. Compare the ACS URL in the application with the registered one. |
| The application reports an invalid name ID policy | The application asked for a name ID format the choice in step 6 cannot give. Set the application’s format to the one in the table, or change the choice. |
| “That application identifies people by an attribute this sign-in cannot supply, so there is no name to put in the assertion.” | The value chosen in step 6 is empty for this person. Fill it in the directory, or choose another value. |
| The tile shows Not set up yet | The status is Incomplete, usually because the launch URL is missing. |