SSOGEN / Single sign-on for Oracle Fusion Cloud ERP with SSOGEN
SSOGEN
Single sign-on for Oracle Fusion Cloud ERP with SSOGEN
SSOGEN joins the environment's OCI IAM identity domain as a SAML identity provider once, and every Fusion pillar signs people in through it.
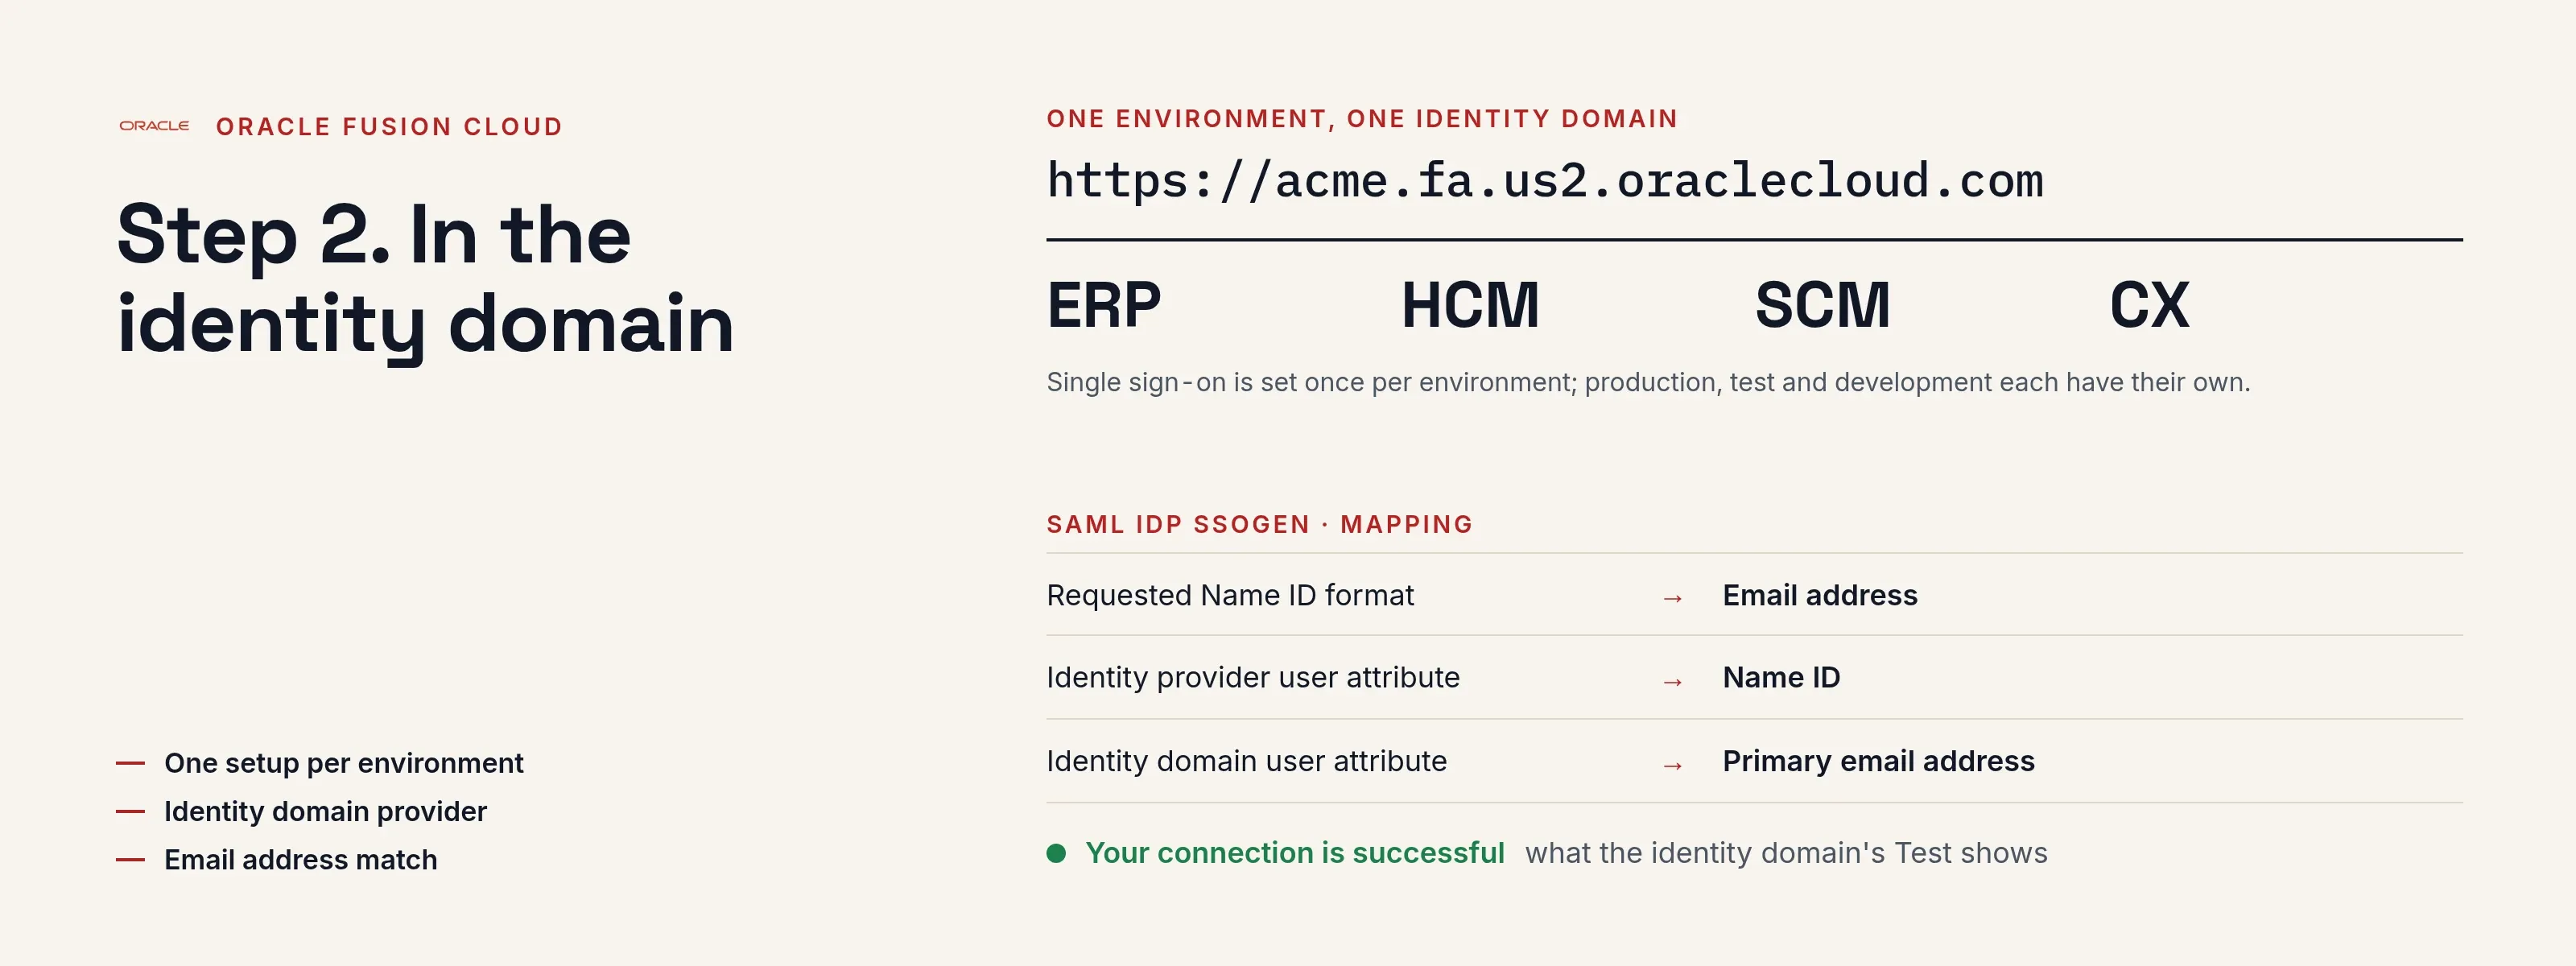
The example environment is https://acme.fa.us2.oraclecloud.com; SSOGEN runs at https://acme.ssogen.ai.
What you need
- An Identity Domain Administrator (or Security Administrator) of the identity domain that belongs to the Fusion environment, and access to the Oracle Cloud Console.
- Every person as a Fusion user whose email address equals their email in SSOGEN. Users are created in Fusion as before.
- An SSOGEN administrator who can save SAML applications (see Add a SAML application in SSOGEN).
If the Fusion Security Console still shows a Single Sign-On menu, the environment has not moved to an identity domain yet: the same values go into Tools > Security Console > Single Sign-On > Create Identity Provider, with Fusion’s service provider metadata from Service Provider Details. Each environment (production, test, development) has its own metadata; label the files.
Step 1. In SSOGEN: add the ERP application
- In the Oracle Cloud Console open the environment (Applications Home > Fusion Applications > the environment) and select its Associated identity domain. Select Federation, then Export SAML metadata, Metadata file and Download XML.
- Follow Add a SAML application in SSOGEN with the gallery card Oracle Fusion Cloud ERP and these values:
| SSOGEN field | Value for Oracle Fusion |
|---|---|
| Metadata | Upload the file from point 1 |
| Service provider entity ID | The domain’s Provider ID (from the file) |
| Assertion consumer service URL | The domain’s Assertion consumer service URL (from the file) |
| Identify the person by | email — mail address |
| Launch URL (https) | https://acme.fa.us2.oraclecloud.com |
Assign the person who will run the first sign-in.
Step 2. In the identity domain
- On the domain’s Federation page select Add IdP, then Add SAML IdP. Enter Name
SSOGEN: people see this name on the sign-in page. Select Next. - On Exchange metadata choose Import IdP URL and enter
https://acme.ssogen.ai/saml/idp/metadata, or Import IdP metadata withssogen-idp-metadata.xml. Leave the advanced options as they are: Signature hashing algorithm SHA-256, no encrypted assertion. Select Next. - On the mapping page set Requested Name ID format to email address, Identity provider user attribute to the SAML assertion Name ID, and Identity domain user attribute to the primary email address. Select Next, check the review and select Create.
- Select Test. SSOGEN’s sign-in page appears; after signing in the browser shows “Your connection is successful”. Use a private window for a clean test.
- Select Activate.
- Select Assign to IdP policy rule, or open Default Identity Provider Policy > Identity provider rules, Edit IdP rule on the rule, and add
SSOGENunder Assign identity providers. Leave Username-Password in the list for now. Save changes.
When single sign-on has worked for real users, you can remove Username-Password from the same rule; the Fusion sign-in page then shows only SSOGEN. Read step 3 first.
When SSOGEN’s signing certificate changes, load SSOGEN’s metadata again into the identity provider (three-dot Actions > Edit on the identity providers list).
Step 3. People and a sign-in test
- Assign the people or groups who use Fusion on the application’s Assignments tab in SSOGEN.
- Sign out, open
https://acme.fa.us2.oraclecloud.com, select the SSOGEN link on the sign-in page and sign in at SSOGEN. Fusion opens as that person.
While Username-Password stays in the policy rule, every Fusion user can still sign in with a password. An identity domain administrator can always sign in to the domain through the Oracle Cloud Console and change the rule or deactivate the provider.
Signing in
People select Oracle Fusion Cloud ERP in My Apps, or open the environment address, and select SSOGEN on the sign-in page. They see SSOGEN’s sign-in page only if they have no SSOGEN session yet.
Troubleshooting
| What you see | Cause |
|---|---|
| The test does not reach “Your connection is successful” after SSOGEN’s sign-in | The person’s email in SSOGEN is not the primary email of a user in the identity domain, or the mapping on step 2, point 3 uses another attribute. |
| SSOGEN page “Sign-in refused” with “No service provider is registered here with that entity ID.” | The metadata registered in SSOGEN is from another environment. Each environment has its own identity domain and metadata. |
| The application reports an invalid name ID policy | Requested Name ID format asks for email while SSOGEN identifies the person by another value. Choose email — mail address in SSOGEN. |
| “Federated User cannot do a local authentication.” | A federated user tried the password sign-in. Use the SSOGEN link. |
| Sign-in stops working on one day | SSOGEN’s signing certificate changed. Load SSOGEN’s metadata into the identity provider again. |