Register AI agent identities: turn on, test and activate
To register an AI agent, you first turn the feature on for your organization, then give the agent an owner, a key and access to an application. This guide takes you from nothing to one working AI agent. You will turn the feature on, open one application to agents, register an agent called Invoice Assistant for Acme Corp, test it and activate it. A short section at the end explains service applications, which are a different thing.
Before you start
- You are signed in to the Admin Console as a super-administrator. Only a super-administrator can turn the feature on or off, and only a super-administrator can engage a kill switch. Other administrator roles that can read the setting see the pages but cannot change it.
- The application the agent will call exists in SSOGEN. For a web application or an MCP tool server, it is published through an App Proxy route. See the SSOGEN Gateway guides.
- The person who will own the agent has a user account. In this guide the owner is Maria Lopez (
maria.lopez@acme.example). - Every AI agents page may ask you to sign in again before it shows data. That is expected: these pages need a recent sign-in.
Step group 1: turn on AI agents for the organization
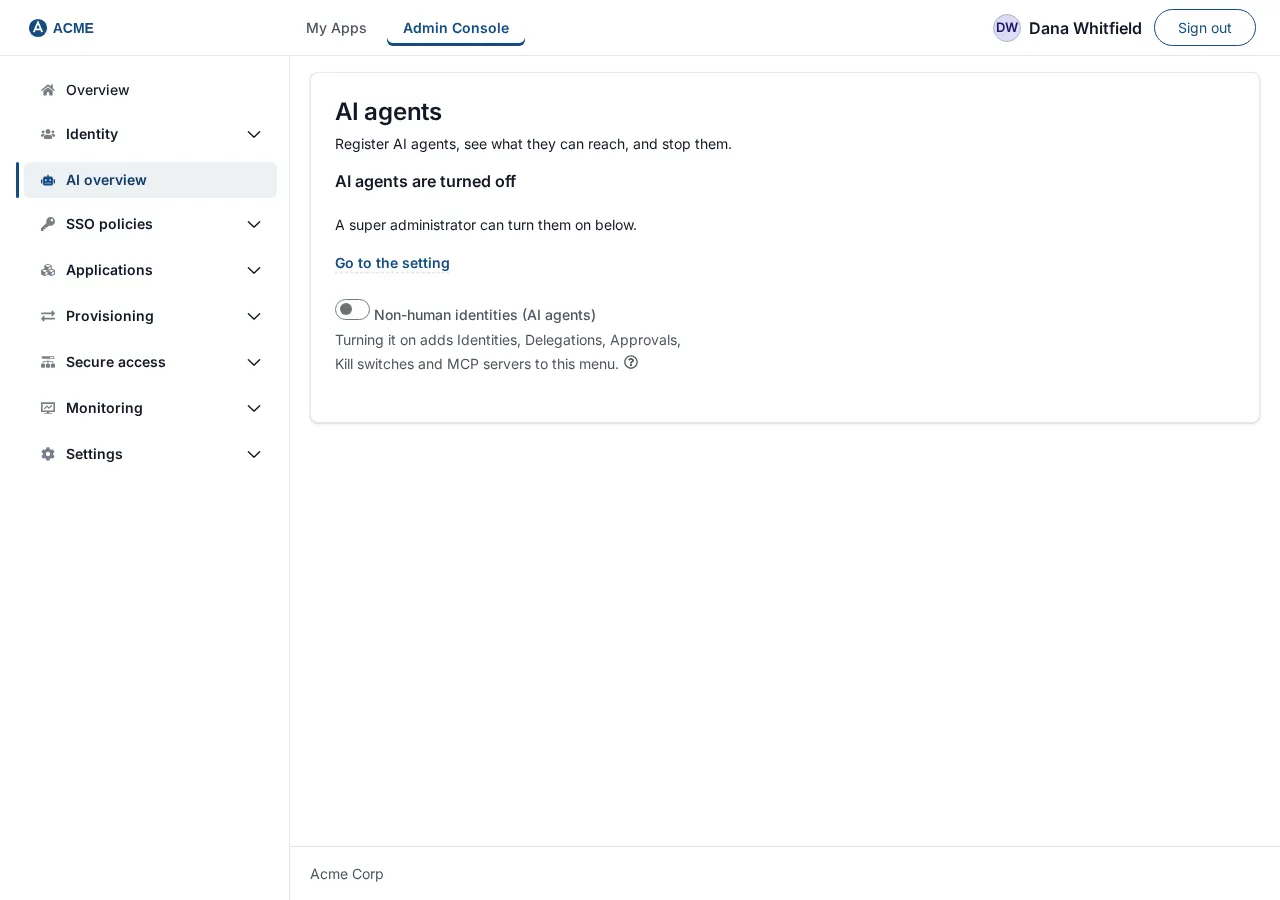
Section titled “Step group 1: turn on AI agents for the organization”AI agents are off in every new organization. While they are off, every agent request is refused, and the AI agents menu group shows only AI overview.
-
In the console menu, open AI agents, then AI overview.
-
You see the heading AI agents (“Register AI agents, see what they can reach, and stop them.”) and the message AI agents are turned off (“A super administrator can turn them on below.”, with a link Go to the setting).
-
At the bottom, under Organization setting, switch on Non-human identities (AI agents).
-
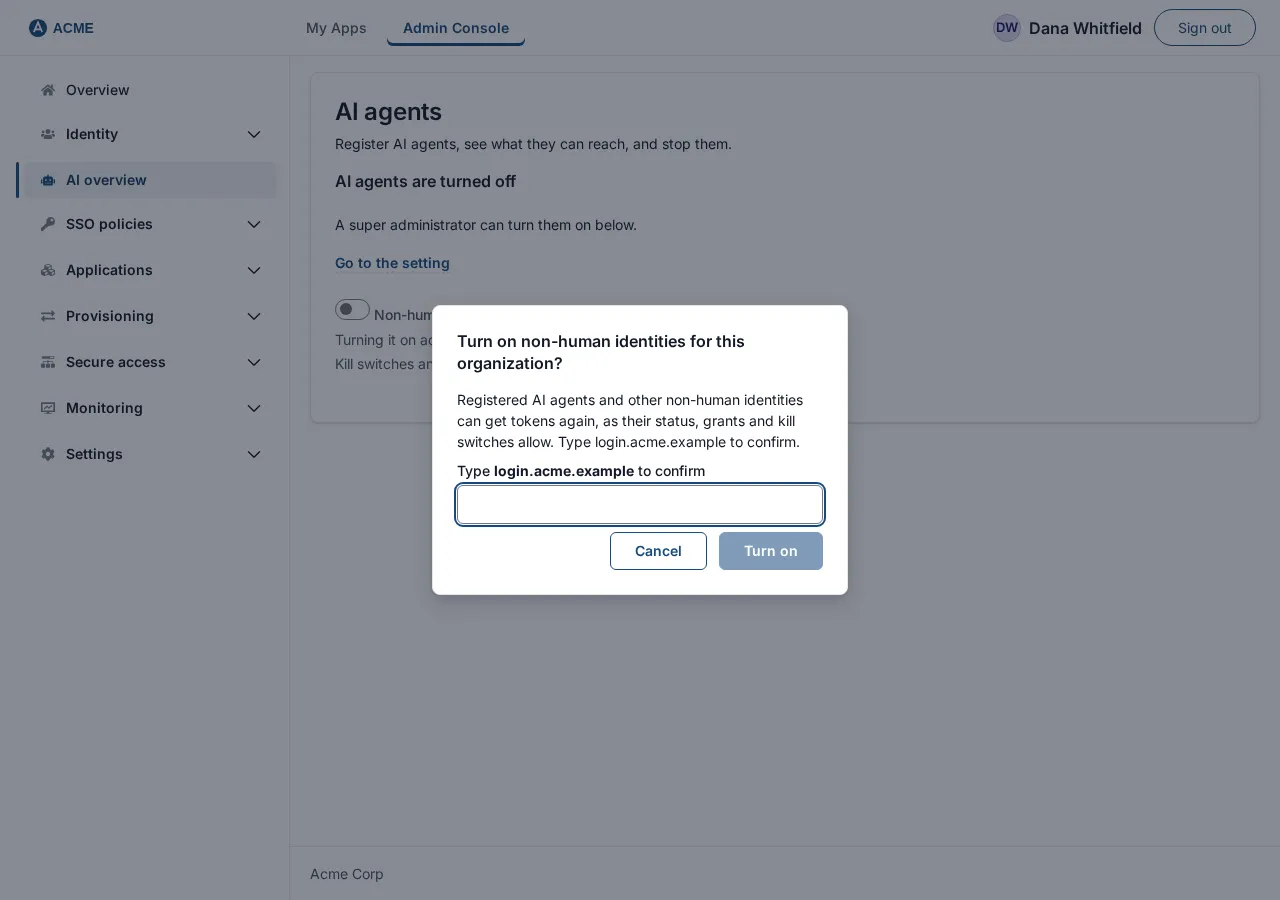
A dialog asks Turn on non-human identities for this organization? It says registered AI agents “can get tokens again, as their status, grants and kill switches allow”. Type the organization’s name exactly as shown in the dialog, then select Turn on.
-
The menu now lists AI overview, Identities, Delegations, Approvals, Kill switches and MCP servers. The Overview page shows Register an AI agent and, when you have none, No AI agents yet.
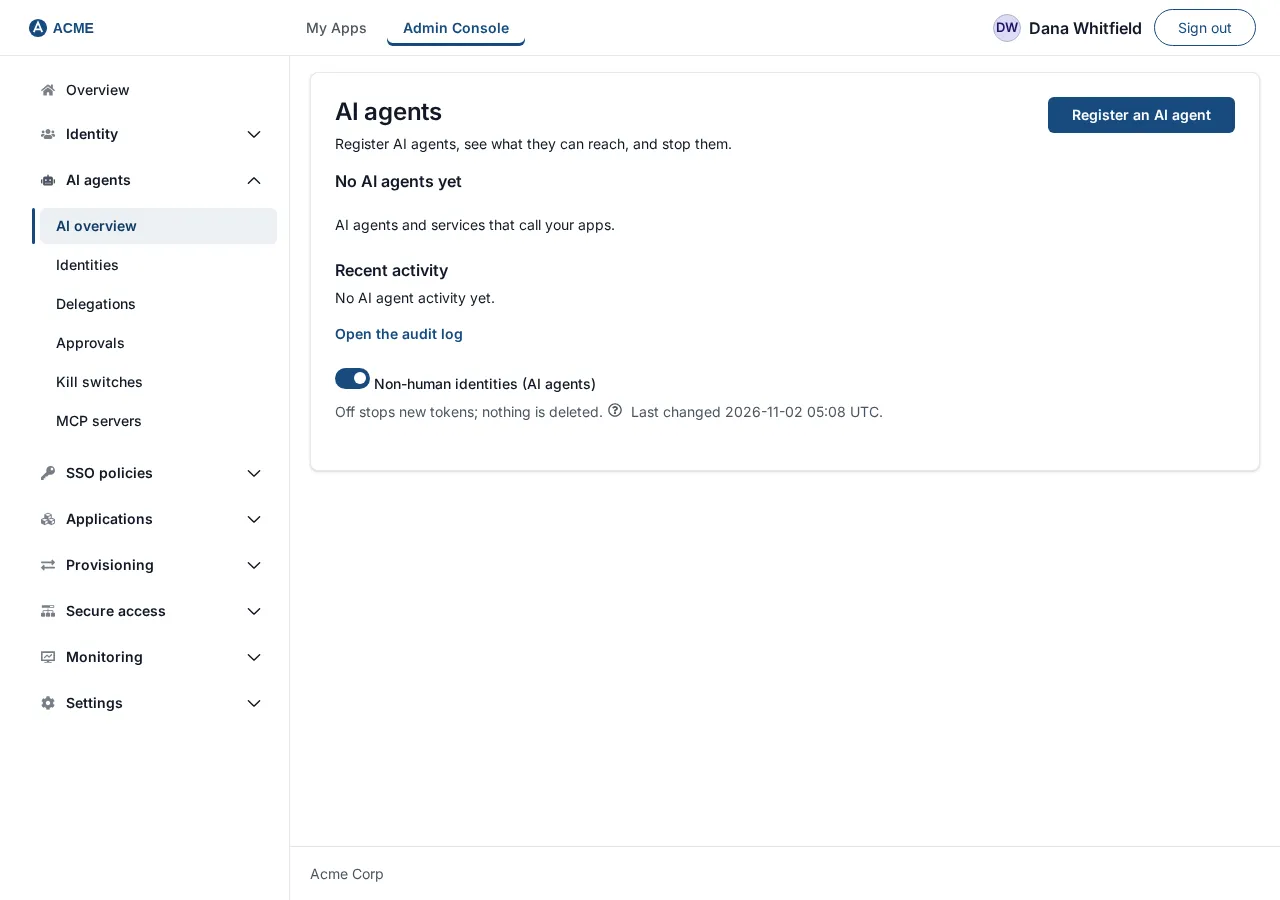
If it fails. If the page says “AI agents cannot be turned on: no AI agent signing key is installed. Ask the operator to install it …”, the server’s operator has not installed the signing key for agent tokens. Ask the operator; sign-in for people is not affected. If you see “The organization’s name could not be read, so the change cannot be confirmed. Try again in a moment.”, wait and retry. If the name you typed does not match, the message is “The confirmation did not match.”
Step group 2: open an application to agents
Section titled “Step group 2: open an application to agents”An agent can only be granted access to an application that has been opened to non-human callers. This is done once per application.
-
Open Applications and select the application (here Acme Invoices).
-
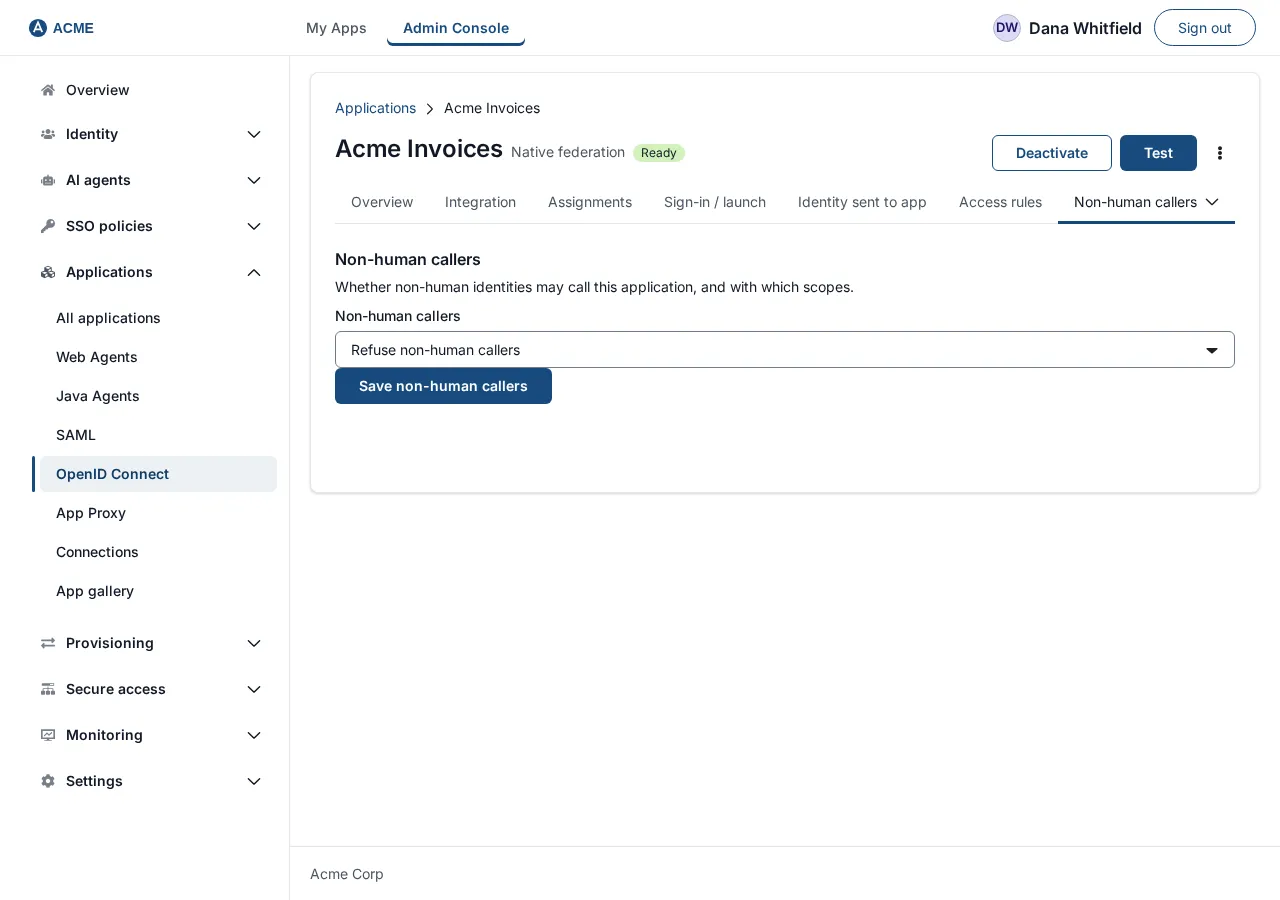
Open the tab Non-human callers. The tab exists only while AI agents are turned on.
-
Choose Non-human callers. The choices are:
- Refuse non-human callers (the default).
- Allow, and tell the application which non-human identity is calling: the application is told which agent is calling.
- Allow only on behalf of a person, and tell the application which person: agents may only act for a person, and the application is told which person.
-
Choose Allow, and tell the application which non-human identity is calling. More fields appear.
-
In Resource identifier, enter an https address that names this application in tokens, for example
https://invoices.acme.example/api. It must be unique across your applications. After you save, a Saved resource identifier copy box shows it. -
In Protocol, leave HTTP. (MCP is for tool servers; see the MCP guide.)
-
Under Scope catalog, select Add scope and fill in one scope:
- Scope:
invoices.read - Kind: Standard
- What it allows, in words:
Read invoices. People see this sentence on the consent screen, so write it for them. - Methods:
GET - Path prefixes:
/invoices
Add a second scope: Scope
invoices.approve, Kind Sensitive, What it allows, in wordsApprove an invoice for payment, MethodsPOST, Path prefixes/invoices/approve. A Sensitive scope needs the person’s approval at every use. You can have at most 64 scopes. Remove scope … deletes one.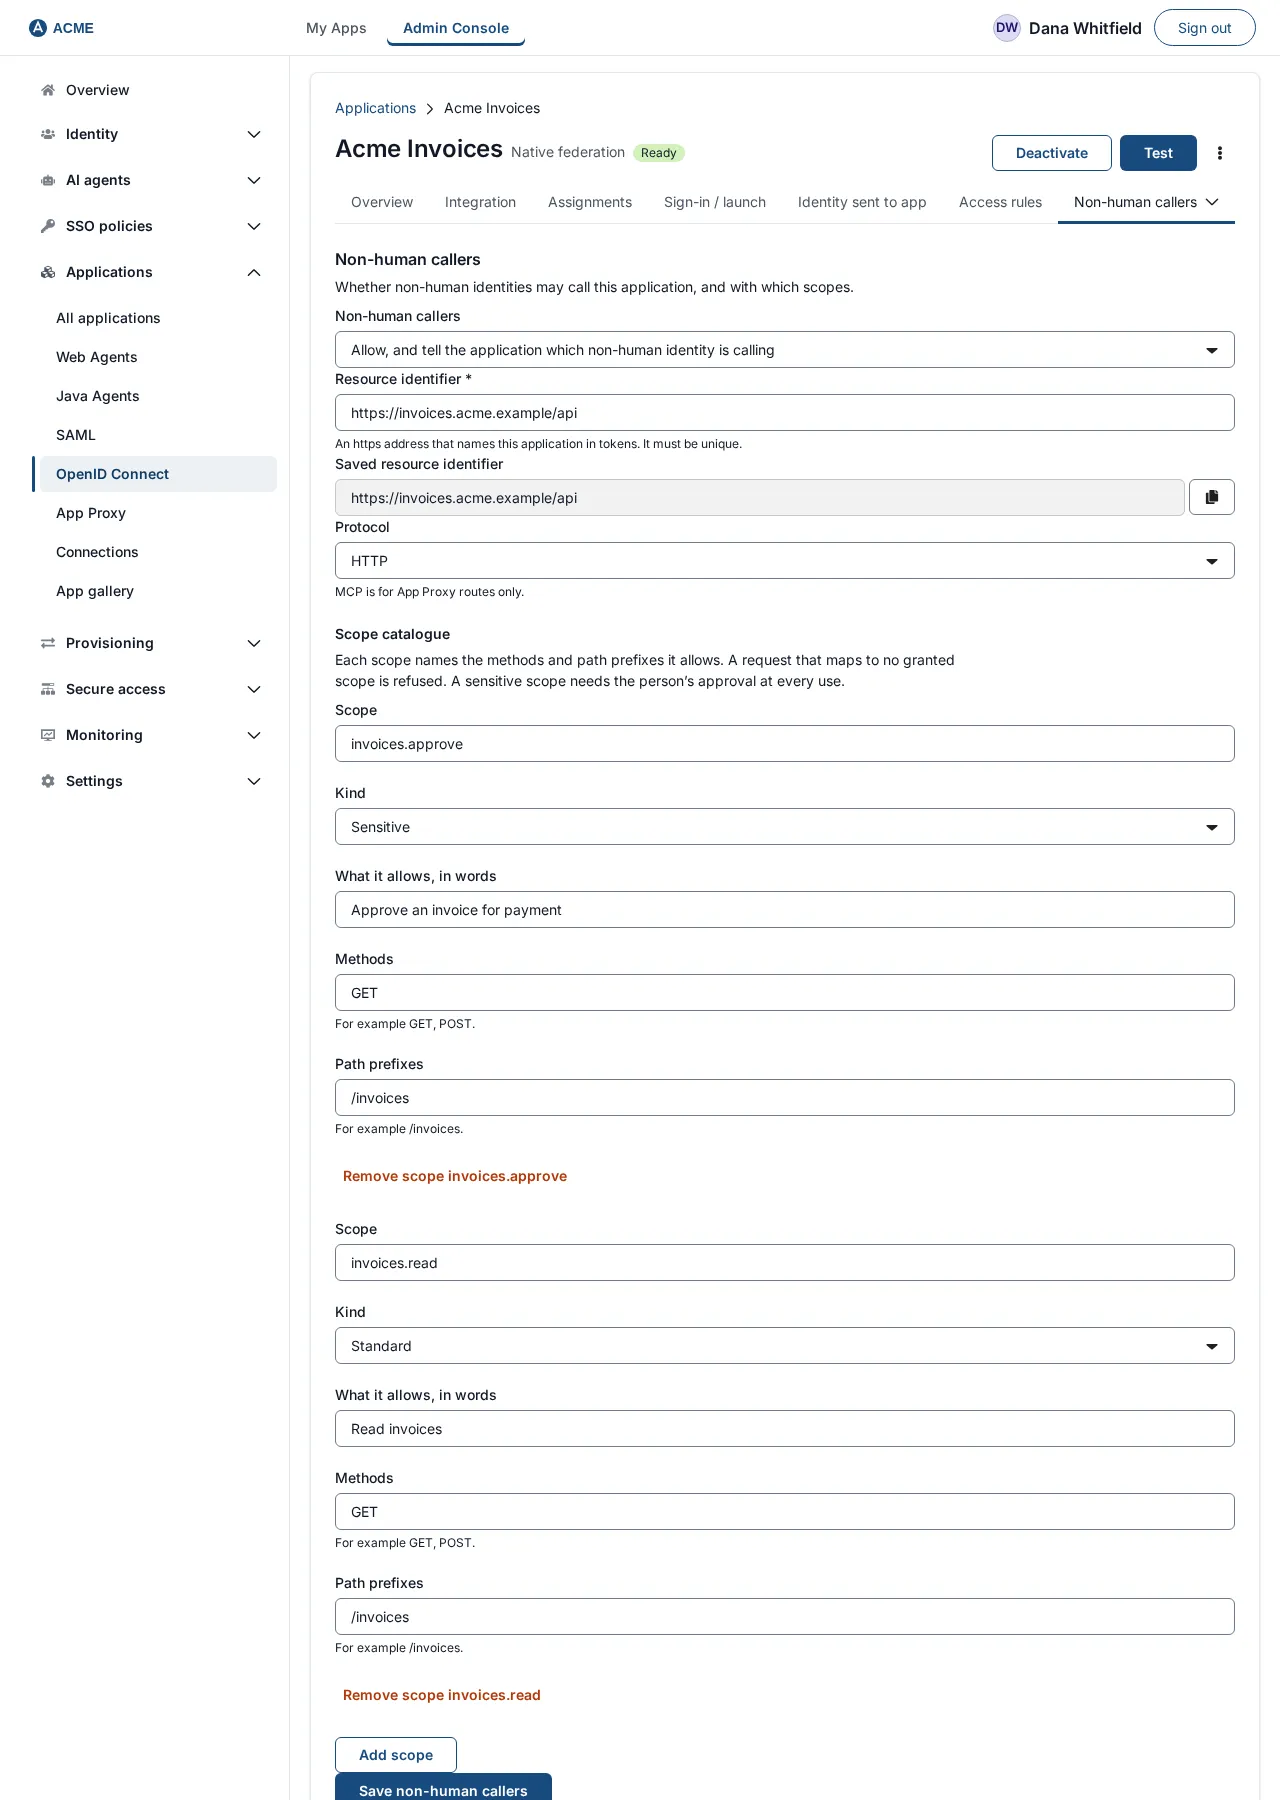
- Scope:
-
Select Save non-human callers. The scopes are saved first, then the setting.
Check it worked. The Saved resource identifier box appears with your address. If a message appears instead:
| Message | Meaning |
|---|---|
| “That resource identifier is used by another application.” | Pick another address. |
| “An enforcer serving this application is too old to enforce this. Update it, then try again.” | An App Proxy or Web Agent serving the application must be updated first. |
| “The resource host must be one of this application’s App Proxy route hosts.” | Only for MCP: the address must use the host of the application’s App Proxy route. |
| “Someone else changed this at the same moment. Reload and try again.” | Reload the application and repeat. |
Step group 3: prepare the agent’s key
Section titled “Step group 3: prepare the agent’s key”An agent has no password or shared secret. It signs a short statement with a private key, and SSOGEN checks it against the public key you register. Create the key pair on the machine where the agent runs, and keep the private key there. SSOGEN needs only the public half.
node -e "const c = require('crypto'), fs = require('fs');const { publicKey, privateKey } = c.generateKeyPairSync('ec', { namedCurve: 'P-256' });fs.writeFileSync('invoice-assistant.key.pem', privateKey.export({ type: 'pkcs8', format: 'pem' }), { mode: 0o600 });const jwk = publicKey.export({ format: 'jwk' });jwk.kid = 'invoice-assistant-2026-10'; jwk.alg = 'ES256'; jwk.use = 'sig';console.log(JSON.stringify({ keys: [jwk] }, null, 2));"The command writes the private key to invoice-assistant.key.pem (readable only by you) and prints the public key set, which looks like this (your x and y values differ):
{ "keys": [ { "kty": "EC", "crv": "P-256", "x": "f83OJ3D2xF1Bg8vub9tLe1gHMzV76e8Tus9uPHvRVEU", "y": "x_FEzRu9m36HLN_tue659LNpXW6pCyStikYjKIWI5a0", "kid": "invoice-assistant-2026-10", "alg": "ES256", "use": "sig" } ]}Copy the printed set. Each key needs a kid of 1 to 64 letters, digits, dots, underscores or hyphens, unique in the set. Never copy the .pem file anywhere.
Step group 4: register the AI agent
Section titled “Step group 4: register the AI agent”- Open AI agents, then AI overview, and select Register an AI agent. (You can also open Identities and select Register non-human identity.) The page is titled Register non-human identity: “An AI agent, MCP client, automation or service that calls your applications.” A step bar shows seven steps. You can return to any step you have already reached, and Next stays disabled with a reason shown under the form until the step is valid.
Step 1: Name and type
Section titled “Step 1: Name and type”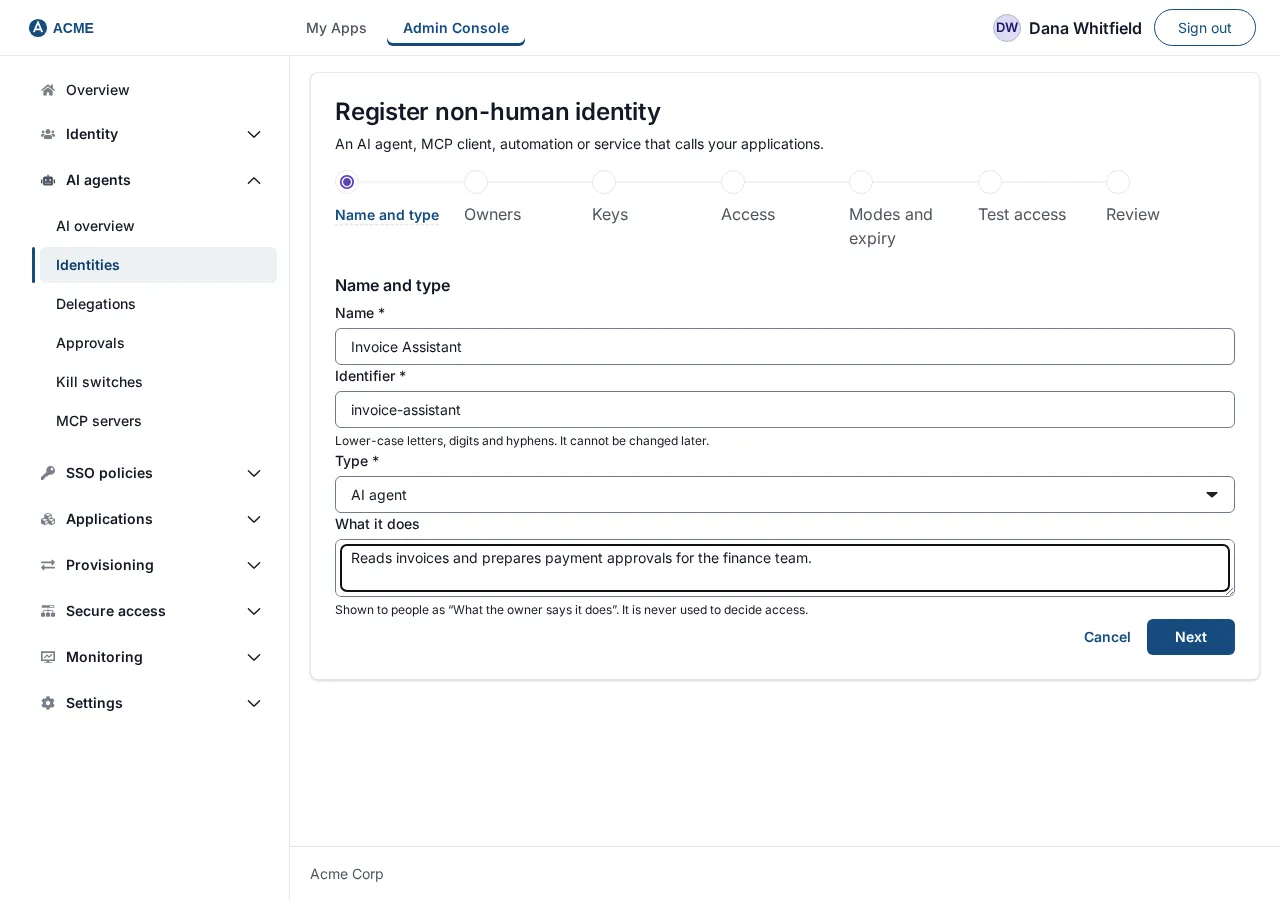
| Field | What to enter | Example |
|---|---|---|
| Name (required) | A name people will recognize. Up to 128 characters. | Invoice Assistant |
| Identifier (required) | Lower-case letters, digits and hyphens, 3 to 63 characters, starting with a letter. It cannot be changed later and must not look like a UUID. | invoice-assistant |
| Type (required) | AI agent, MCP client, Automation or Service. | AI agent |
| What it does | Up to 500 characters. People see it as “What the owner says it does”. It is never used to decide access. | Reads Acme invoices and drafts payment approvals for Accounts Payable. |
Select Next.
Step 2: Owners
Section titled “Step 2: Owners”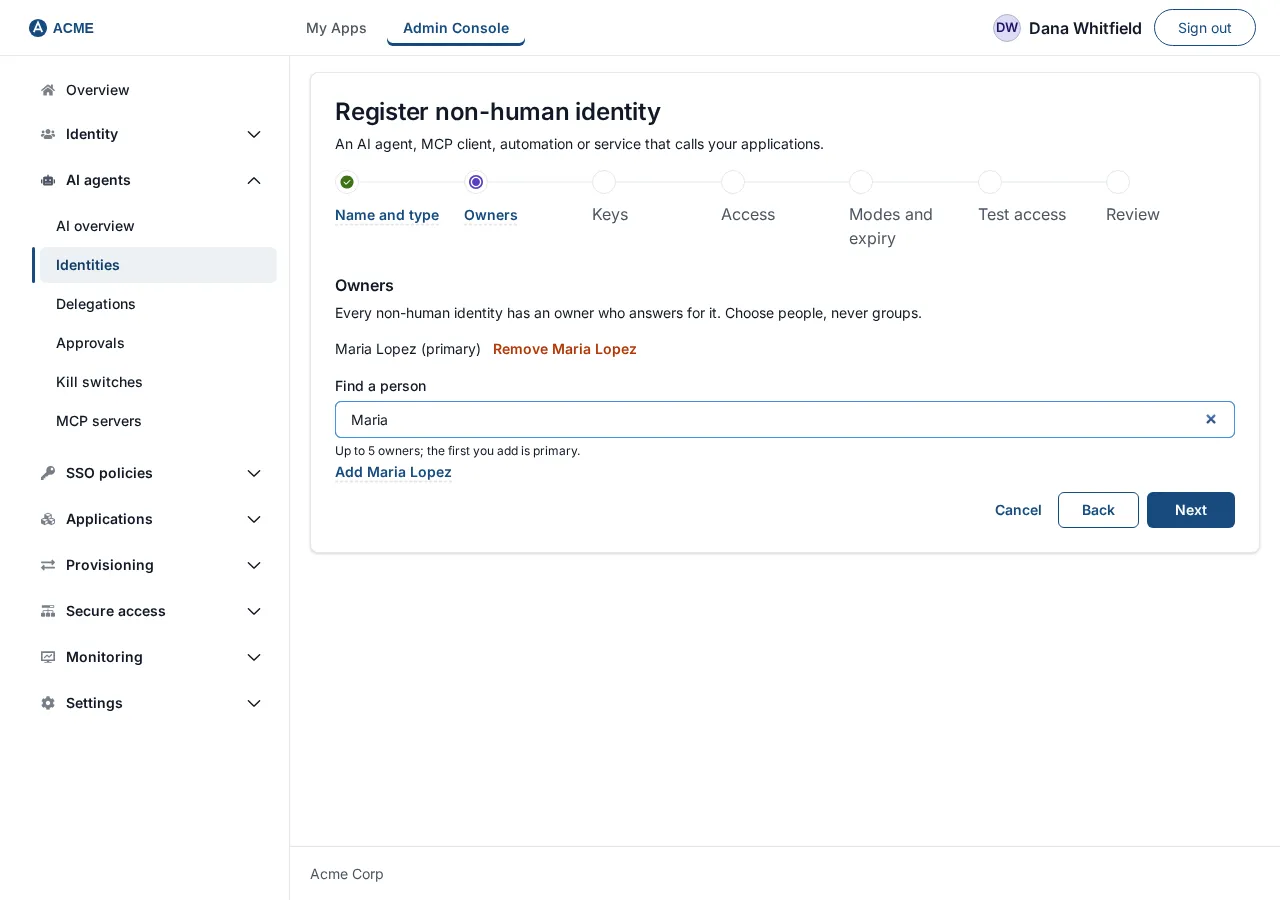
“Every non-human identity has an owner who answers for it. Choose people, never groups.”
- In Find a person, type
Maria. Matching people appear under People found. - Select Add Maria Lopez. She is listed as “Maria Lopez (primary)”. The first person you add is the primary owner.
- To add another owner, search again and select Add
(up to five). To change who is primary, select Make primary . To remove one, select Remove.
Exactly one owner must be primary, at least one owner is required, and nobody may be listed twice. Select Next.
Step 3: Keys
Section titled “Step 3: Keys”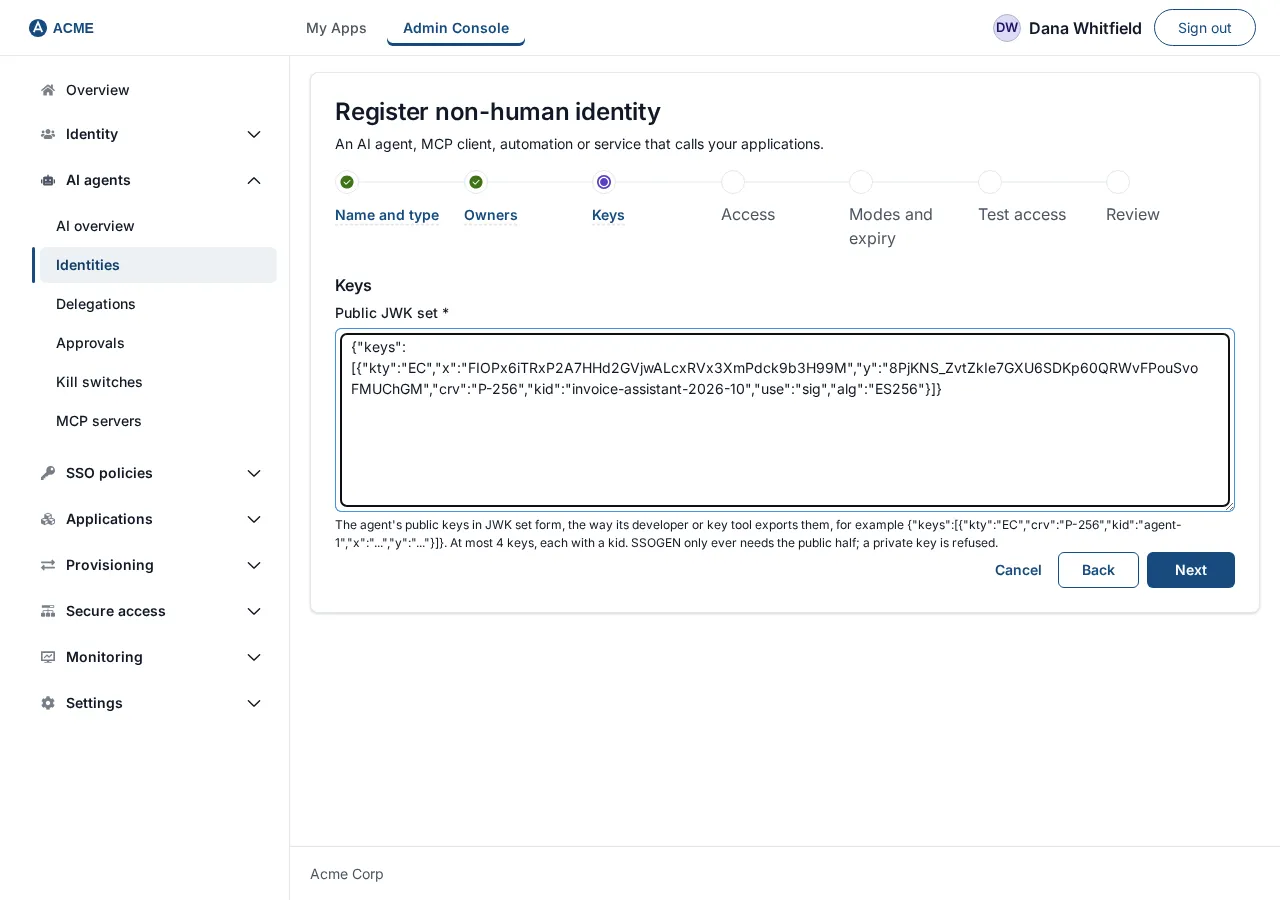
- Paste the public key set from the previous section into Public JWK set (“Public keys only, at most 4, each with a kid. A private key is refused.”).
- If the text is wrong, the field shows one of: “That is not valid JSON.”, “That set holds a private key. Paste public keys only.”, “Every key needs a kid.”, “Two keys share a kid.”, “At most 4 keys.”.
- Two or more keys show a warning: “Clients that don’t name their key in assertions will be refused until only one key remains.” Use one key unless you are rotating.
Only when the Type is MCP client does the step offer the box Public MCP client: no keys, acts only for a person who has allowed it. See the MCP guide. Select Next.
Step 4: Access
Section titled “Step 4: Access”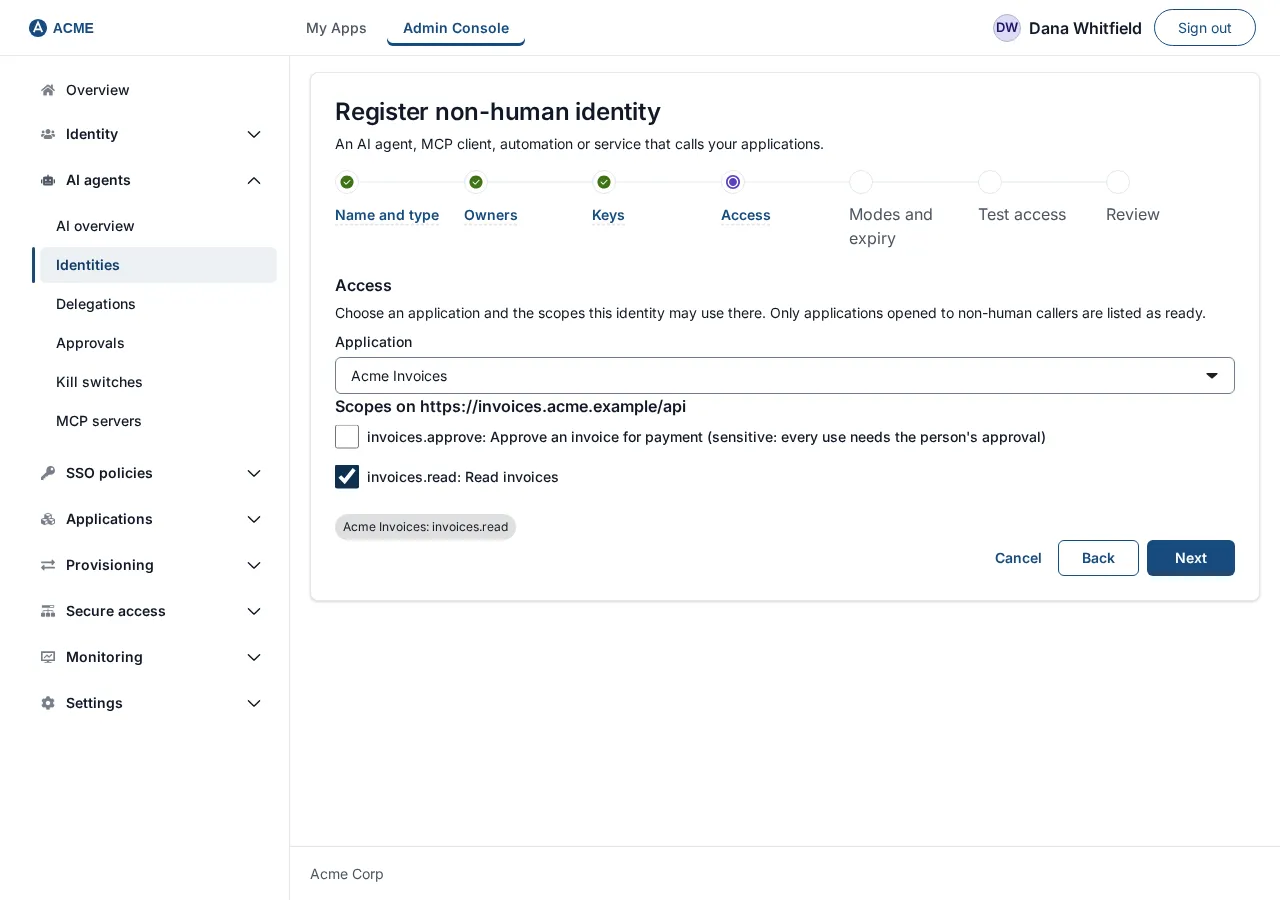
- In Application, choose the application you opened (“Acme Invoices”). Applications that have not been opened show: “This application does not accept non-human callers yet. Allow them below, save, and the scopes appear here.”
- Under “Scopes on https://invoices.acme.example/api”, tick
invoices.read: Read invoices. The sensitive scope is labelled “(sensitive: every use needs the person’s approval)”. Tick it too only if the agent will act for a person and may ask for approvals. - Your choices appear as chips below, for example “Acme Invoices: invoices.read”. You can repeat for other applications. At least one scope on one application is required.
Select Next.
Step 5: Modes and expiry
Section titled “Step 5: Modes and expiry”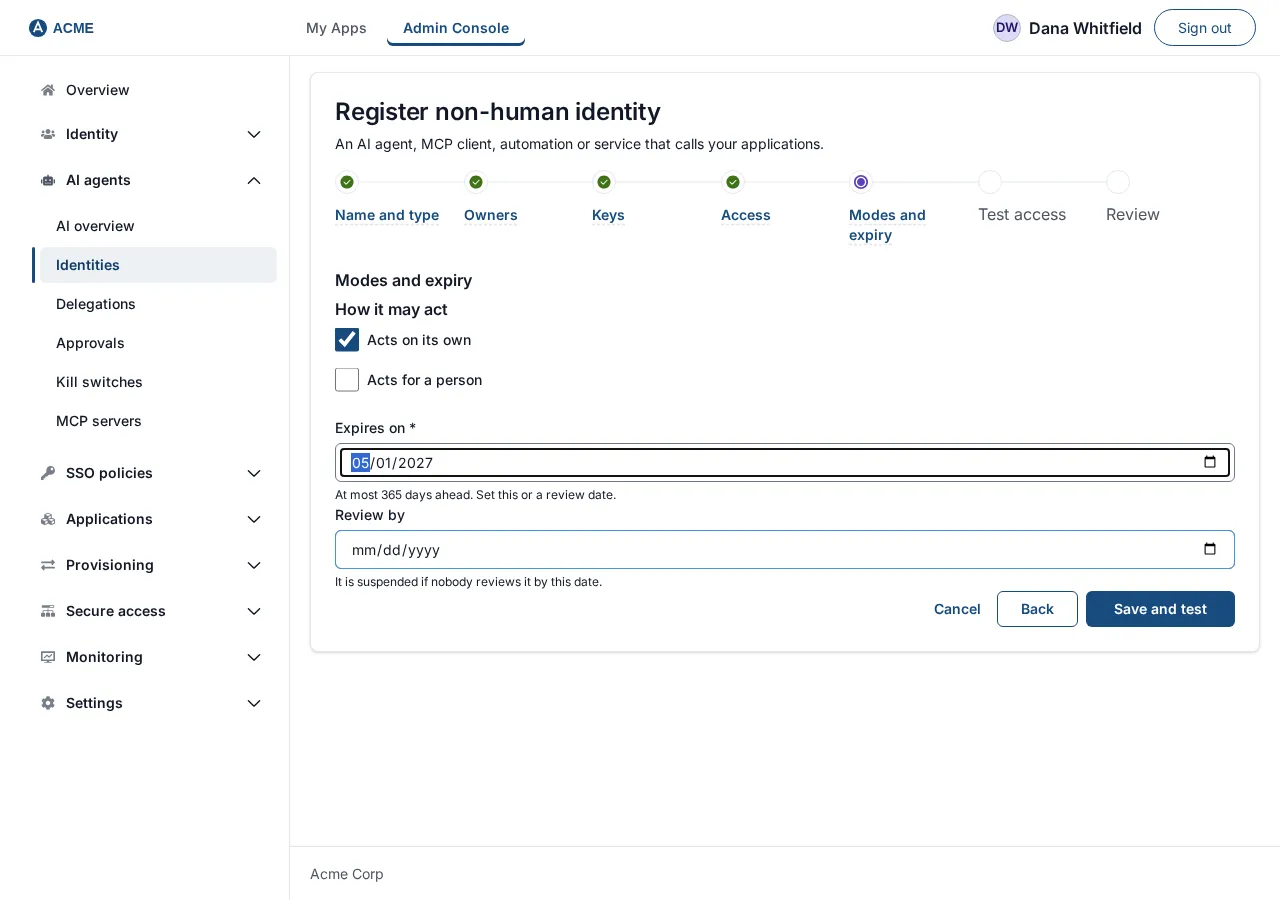
- Under How it may act, tick Acts on its own, Acts for a person, or both.
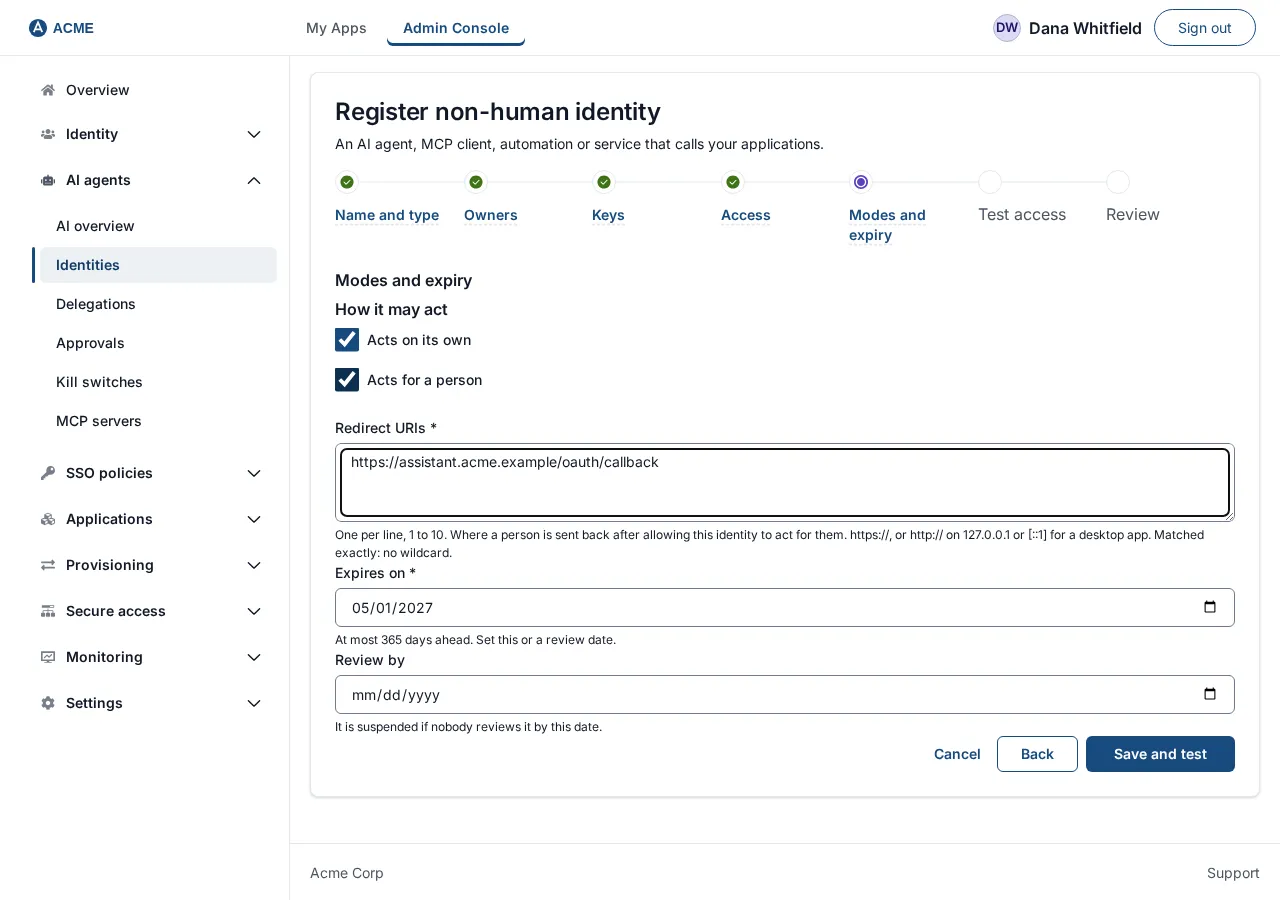
- If you tick Acts for a person, a Redirect URIs box appears (required): “One per line, 1 to 10. Where a person is sent back after allowing this identity to act for them. https://, or http:// on 127.0.0.1 or [::1] for a desktop app. Matched exactly: no wildcard.” Example:
https://assistant.acme.example/oauth/callback. The message for a bad address is “Each redirect URI must start with https:// (or http:// followed by 127.0.0.1 or [::1] for a desktop app), with no * wildcard, no # fragment and no user name.” - Set Expires on (a date up to 365 days ahead), Review by, or both. “Review by”: “It is suspended if nobody reviews it by this date.” The message “Set an expiry or a review date.” appears if both are empty, and “Dates must be in the future and no more than 365 days ahead.” for a bad date.
- The button now reads Save and test. Select it. This saves the agent as Pending. If you cancel after this point, the Pending agent stays in the list.
Step 6: Test access
Section titled “Step 6: Test access”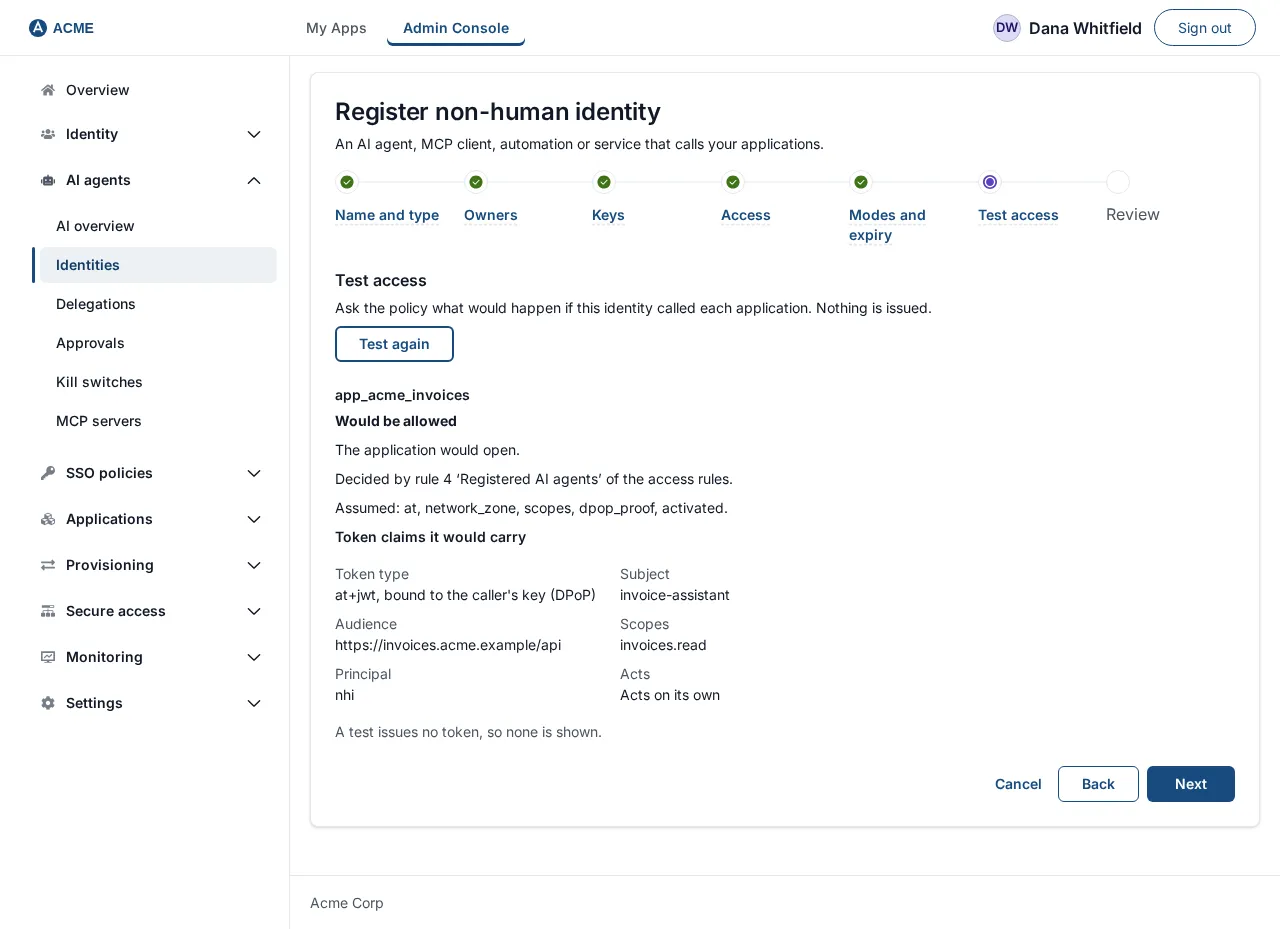
“Ask the policy what would happen if this identity called each application. Nothing is issued.”
-
Select Test access (it becomes Test again afterward).
-
For each application you will see one of these answers:
Answer What to do Would be allowed Passed. Below it, “Token claims it would carry” and “What the application would receive” show what your application will see. A test issues no token, so none is shown. Would be denied by a policy rule. Add a rule that allows it, or change its access. Add an allowing rule in SSO policies, or change the grant. Would be asked for a stronger sign-in, which a non-human identity cannot give. The application’s policy demands interactive sign-in; relax it for this case. Would be refused: it is not given access to this application. Open the application’s Non-human callers tab first. -
An agent that Acts on its own needs every tested application to say Would be allowed before Next is enabled (“Run Test access and get an answer of allowed to continue.”). An agent that acts only for a person needs no passing test.
Step 7: Review and activate
Section titled “Step 7: Review and activate”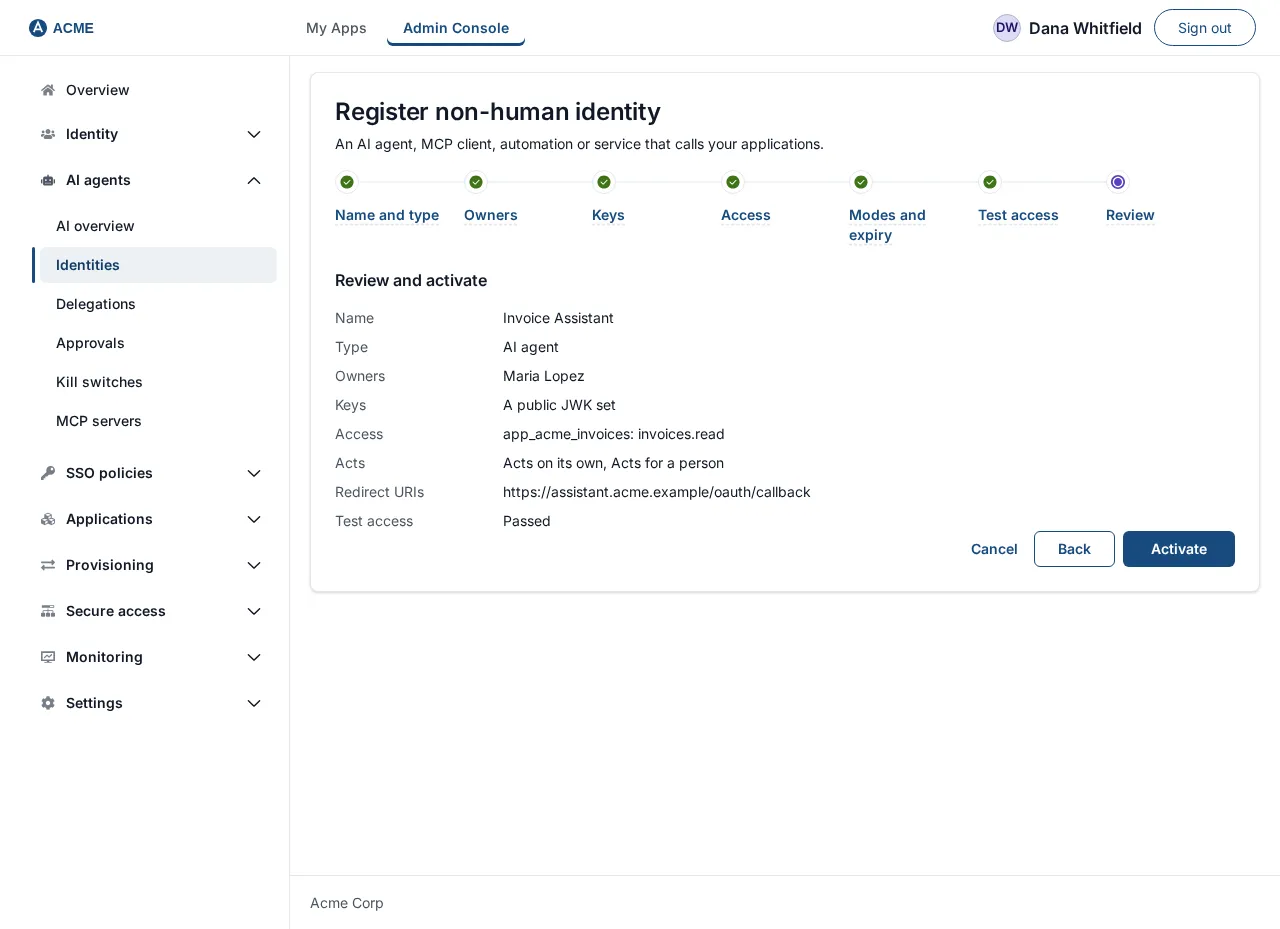
The page lists Name, Type, Owners, Keys, Access, Acts, Redirect URIs (if any) and Test access (“Passed”, “Not passed yet” or “Not needed: it acts only for a person”). Select Activate.
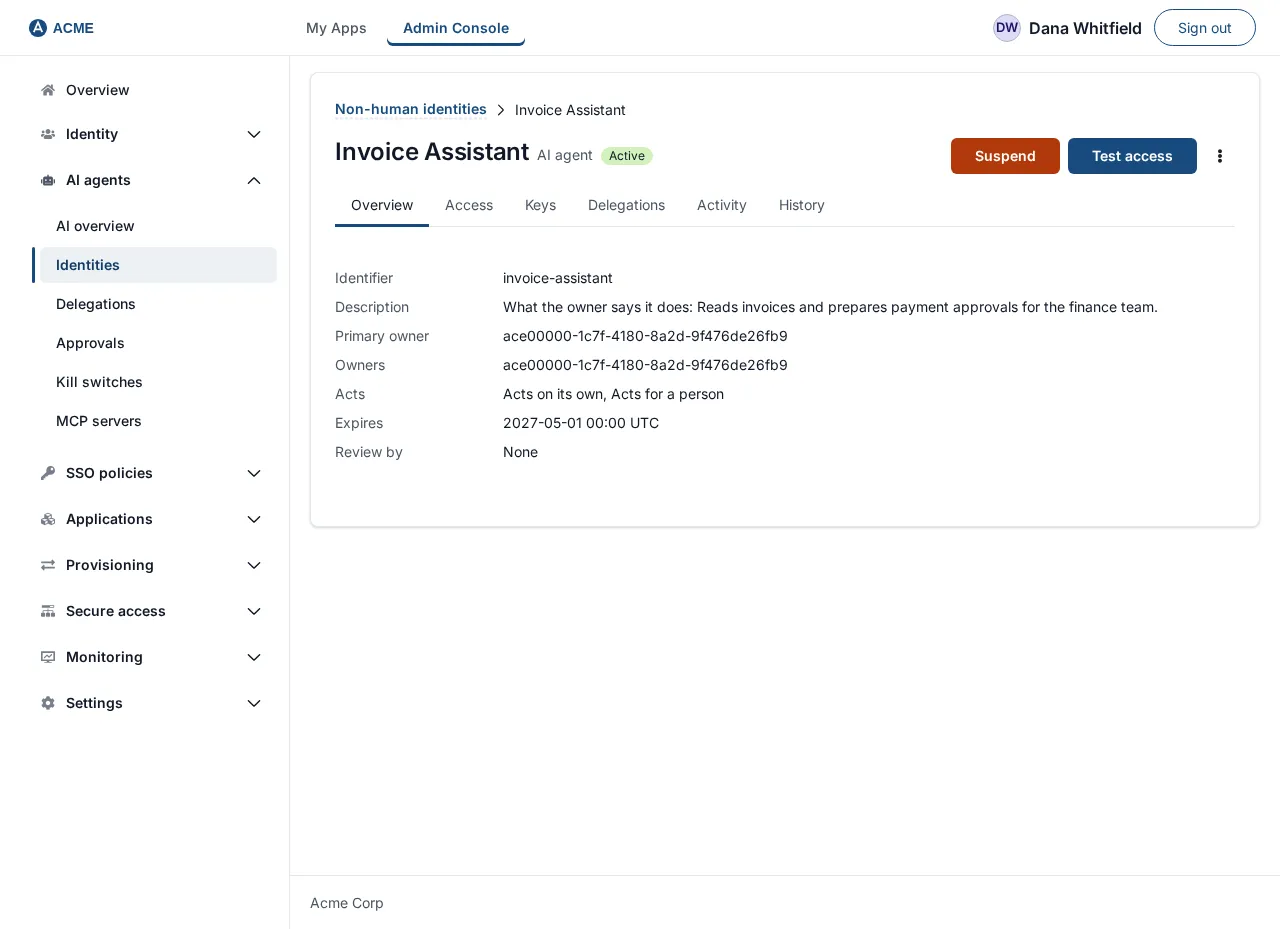
Check it worked. The agent’s page opens with the status Active, the tabs Overview, Access, Keys, Delegations, Activity and History, a red Suspend button and a Test access button.
If activation is refused
| Message | Fix |
|---|---|
| Add at least one key (or make it a public MCP client) and one resource before activating. | Register again with a key and a grant. |
| The kill switch for this type is engaged. Release it before activating. | Release it under Kill switches. |
| Run Test access and get an answer of allowed before activating. | Go back to Test access. |
| An enforcer serving this application is too old to enforce this. Update it, then try again. | Update the App Proxy or Web Agent. |
Step group 5: what the agent does next
Section titled “Step group 5: what the agent does next”The agent now asks SSOGEN for short-lived tokens, using its private key, and presents them to your application. How it does so is a matter of the agent’s code, not of the console. The exact exchange is in the MCP guide. In short:
- Acts on its own: the agent asks for a token for one resource and the scopes it needs. SSOGEN checks that the agent is active and unexpired, that its type’s kill switch is off, that the scopes are within its grant, and that policy allows it. It receives a token tied to its key that lasts about four minutes, with no refresh token.
- Acts for a person: the agent sends the person to sign in and consent, as described in What people see.
Service applications (a different thing)
Section titled “Service applications (a different thing)”A service application is an ordinary application that signs in as itself to call an API: a nightly job, a build server. It has no launch address, no redirect address and no assignments. It is registered under Applications, not under AI agents. It is not an AI agent record, so the owners, review dates, delegation, approvals and kill switches described in this guide do not apply to it. Use a service application when you need a plain OAuth client. Use an AI agent when you need owners, expiry, delegation, approvals and kill switches.
-
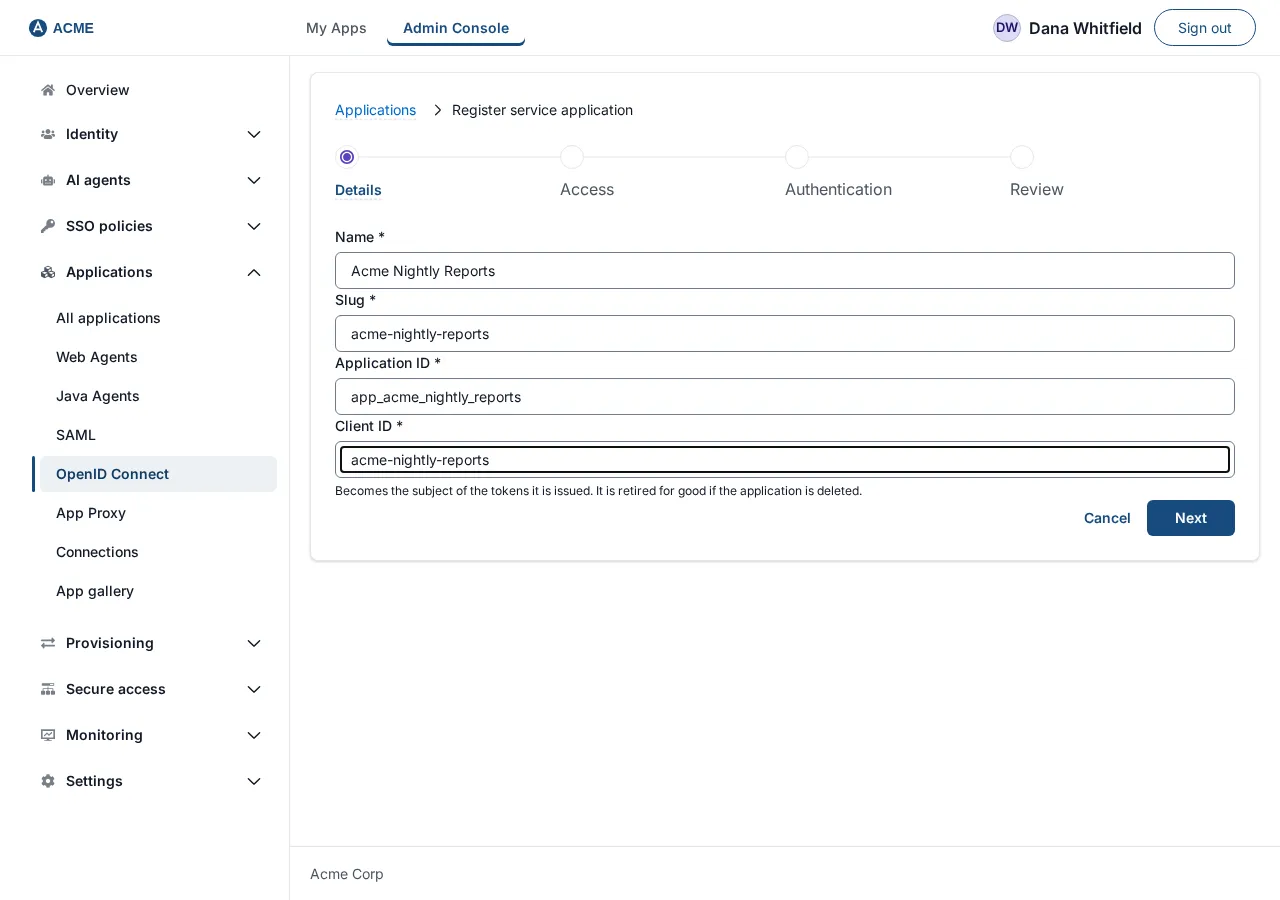
Open Applications and select Register service. The page is Register service application with four steps: Details, Access, Authentication, Review.
-
Details: Name (
Acme Nightly Reports), Slug (acme-nightly-reports), Application ID (app_acme_nightly_reports) and Client ID (acme-nightly-reports; it becomes the subject of its tokens, cannot be a UUID, and is retired for good if the application is deleted). Slug and client ID use lower-case letters, digits and single hyphens. -
Access: Audiences (required): the APIs it may request tokens for, as https addresses or
urn:names, one per line, for examplehttps://reports.acme.example/api. Scopes (optional, one per line;openid,profileandemailare refused). Access token lifetime: 5 minutes, 15 minutes (default), 30 minutes or 1 hour. -
Authentication: Method is Private key JWT (recommended) or Client secret. With Private key JWT, paste Public keys (JWKS) (at most 5). With Client secret, one is generated for you.
-
Review shows the token endpoint and a sample request, such as
curl -X POST <token endpoint> -d grant_type=client_credentials .... Select Register. -
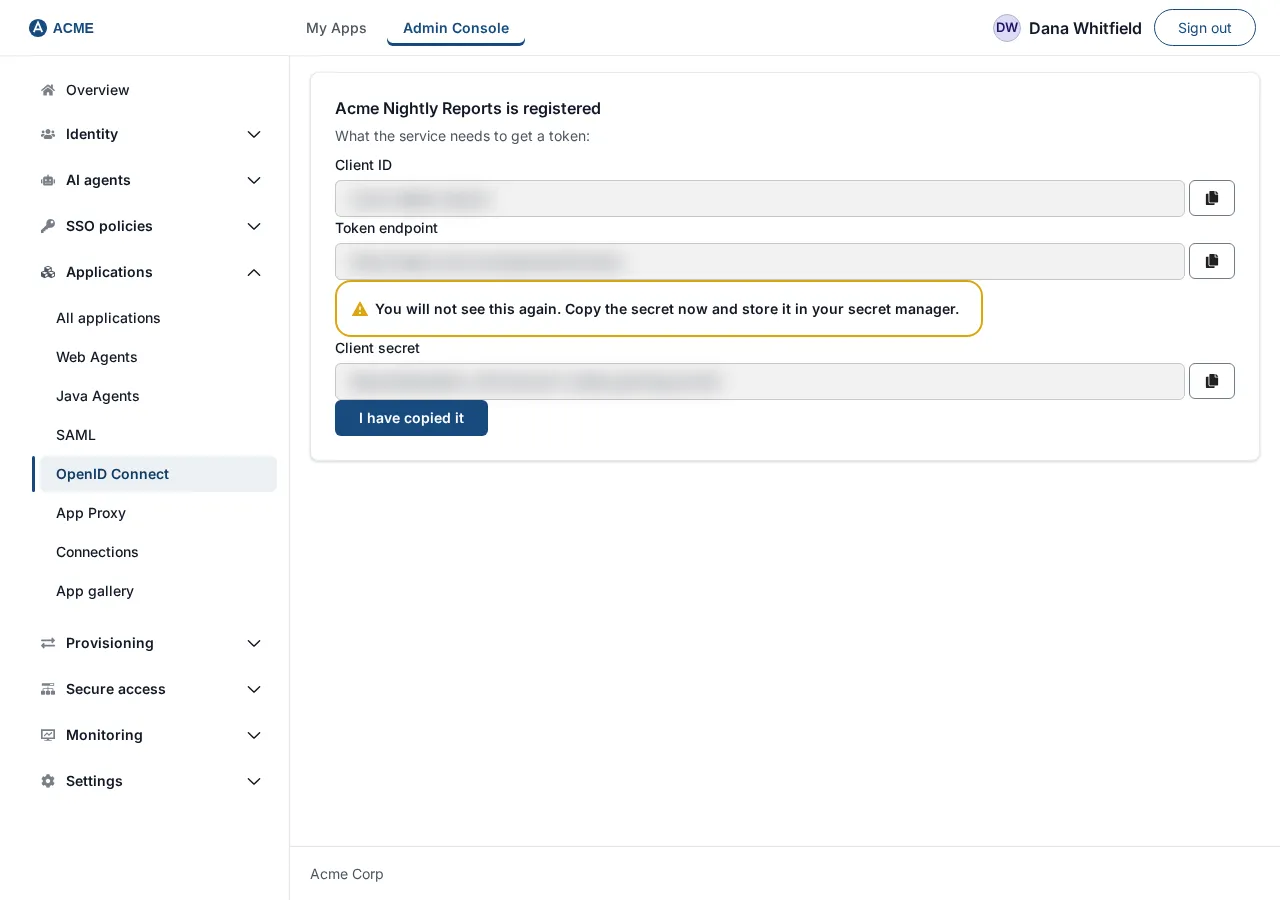
With a client secret, the page shows “You will not see this again. Copy the secret now and store it in your secret manager.” with a Client secret box. Copy it, then select I have copied it.
If something does not work
Section titled “If something does not work”| Symptom | Likely cause |
|---|---|
| The AI agents menu shows only AI overview | The organization setting is off. |
| No Non-human callers tab on an application | The organization setting is off. |
| The agent’s page says “Suspended: its review date passed” | Nobody reviewed it by Review by. Set a new date by registering again; there is no edit for dates in the console. |
| “That was not found, or non-human identities are not turned on.” | The setting is off, or the agent was not found. |
| “Someone else changed this identity. Reload and try again.” | Another administrator changed it at the same time. |