My Account: password, MFA enrollment and passkeys
My Account is where you look after how you sign in to SSOGEN. You can change your password, pair your phone with the SSOGEN Authenticator (or add another authenticator app that makes time-based codes, TOTP), add a passkey, choose where your sign-in codes are sent and keep recovery codes. Sessions, devices, security activity and linked identities are in My Account: sessions and activity.
The examples use the fictional company Acme Corp and an employee, Maria Lopez.
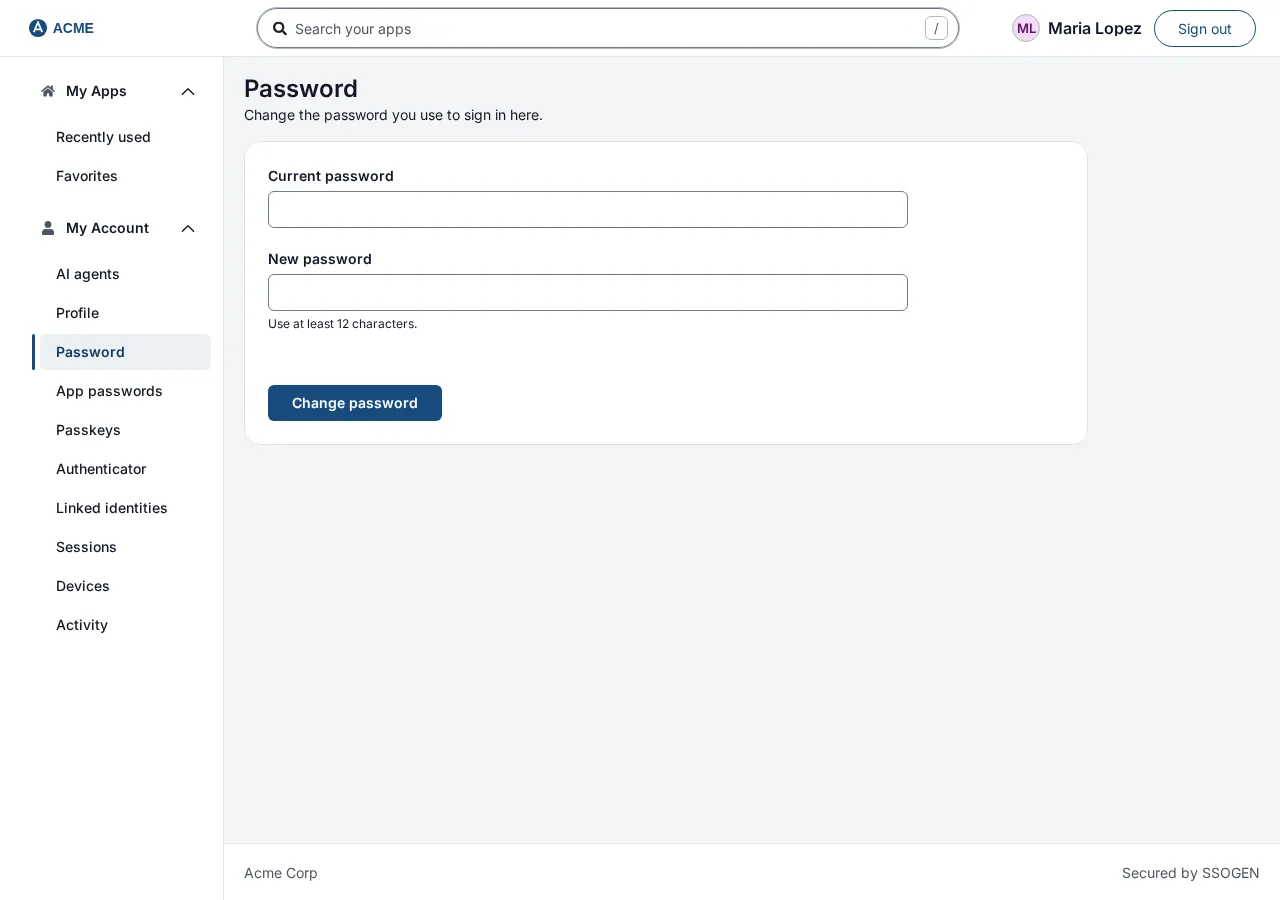
Open it: open your organization’s SSOGEN address (for example https://sso.acme.example/). My Account is the second group in the menu on the left, below My Apps; there is no separate account page. You must be signed in; if you are not, you are taken to the sign-in page first (Signing in).
1. How My Account is laid out
Section titled “1. How My Account is laid out”The My Account group in the menu is one list. Selecting an item shows its page, and the address ends in the item’s name (for example #passkeys), so you can bookmark it.
| Item | What it is for |
|---|---|
| AI agents | “AI agents you allowed to act for you.” See What people see for their AI agents. |
| Profile | “Your profile and account source.” Your name, username, email and phone, where your account comes from, and what you can change yourself. |
| Password | “Change the password you use to sign in here.” Section 3. |
| App passwords | “Passwords SSOGEN uses to sign you in to applications.” See My Account: app passwords. |
| Passkeys | “Sign in with this device.” Section 5. |
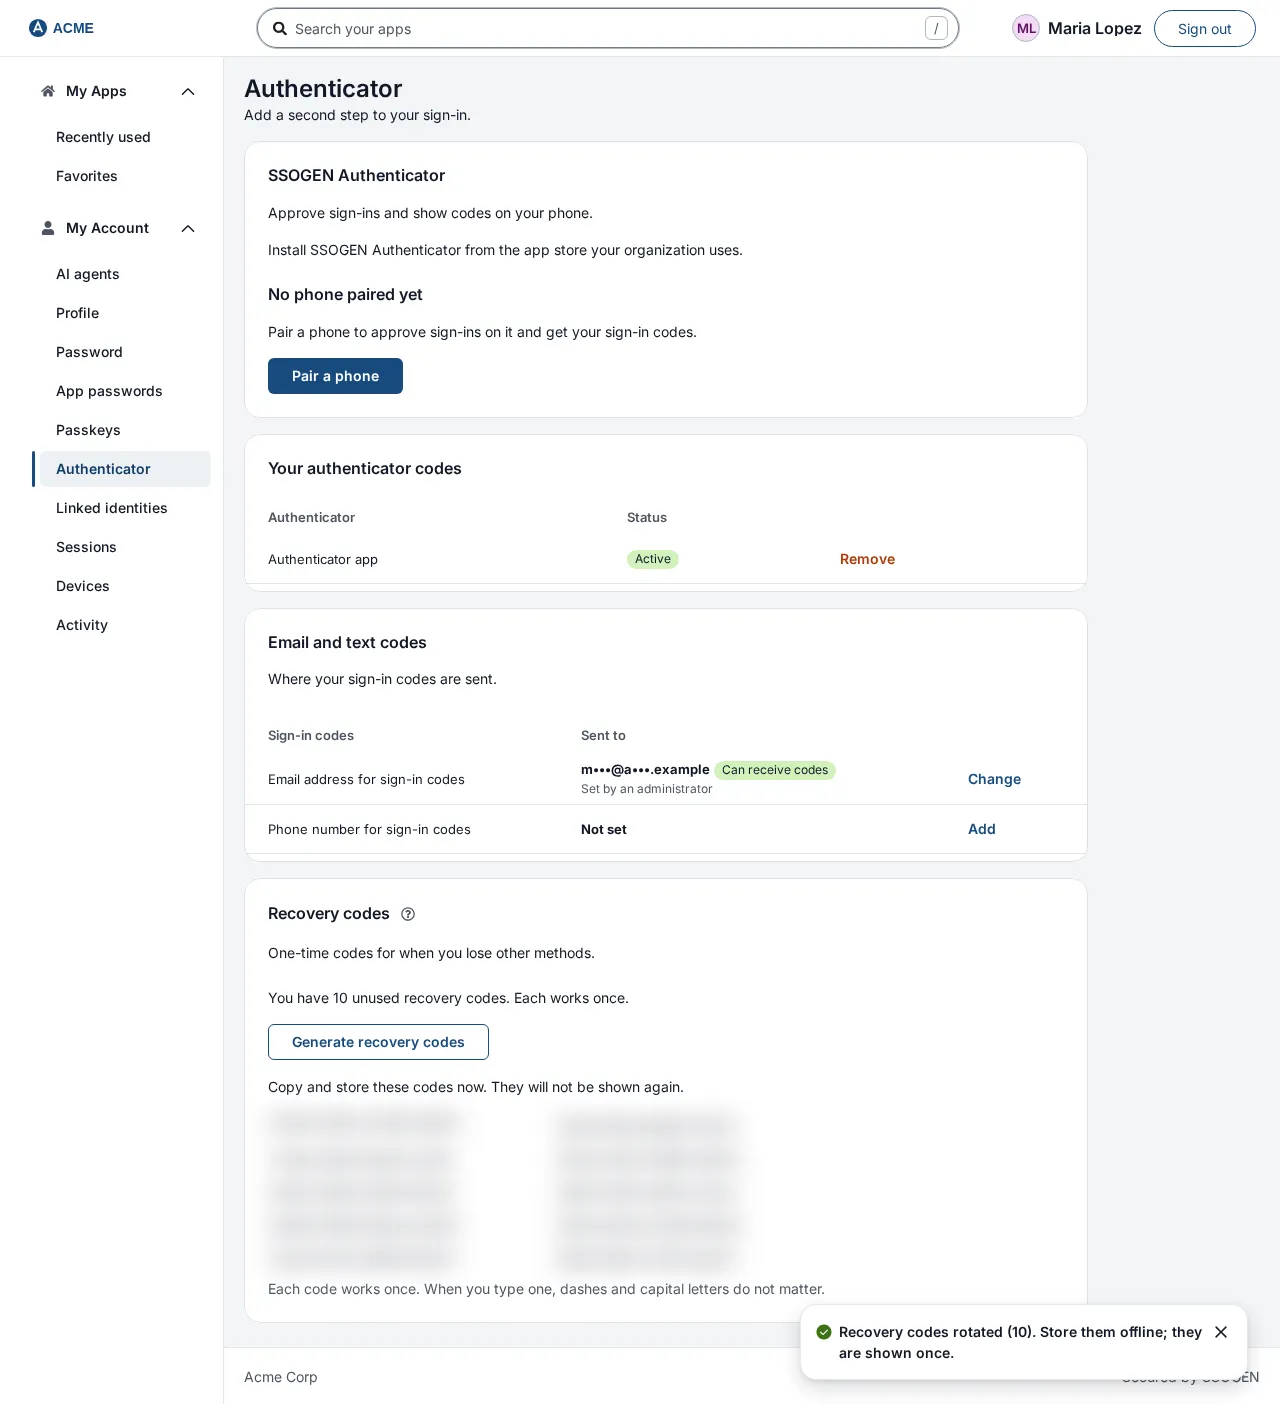
| Authenticator | “Add a second step to your sign-in.” Your paired phone and authenticator codes, where sign-in codes are sent, and recovery codes (sections 4, 6 and 7). |
| Linked identities | “The sign-in methods linked to this account.” |
| Sessions | “Where you are signed in.” |
| Devices | “Browsers you have signed in on.” |
| Activity | “Recent sign-ins and changes to how you sign in.” |
If your organization does not use recovery codes, that part of the Authenticator page says so. On a phone the menu folds into a button with three bars at the top left; select it to open the menu, choose an item, and the page appears.
2. Why you are sometimes asked to confirm it is you
Section titled “2. Why you are sometimes asked to confirm it is you”Your security settings are valuable to anyone who might get into your account. So SSOGEN asks you to prove it is you again, even though you are already signed in, before it lets you add or change an authenticator, a passkey, recovery codes or where codes are sent, or sign out your other sessions. There is no separate page for this: a box appears at the top of the page you are on. What it asks for depends on whether you already have a second factor.
If you do not have a second factor yet (no authenticator, no unspent recovery codes, no passkey), adding your first needs a recent sign-in. A box headed Confirm identity says so. Any one of these counts:
- You signed in to SSOGEN within the last 5 minutes. Your organization may set a shorter time.
- You type your Current password into the box and select Confirm. If your account comes from your company’s directory, this is your directory password. A green message says Identity confirmed. You can continue with authenticator changes.
- Your account is managed by your company’s other sign-in service (for example Microsoft Entra ID). There is no password to type here, so the box says “Sign in again with your organization, then add your first second factor within five minutes.” Select Sign in again. That sign-in service asks you to sign in afresh and brings you back.
If the password is wrong the page says Your identity was not confirmed. Check your password and try again.
If you already have a second factor, your password is not enough. A box headed A second step is needed says “Verify with a second step to continue. A password alone is not enough.” Select Verify with a second step, complete it (your authenticator app or a recovery code, or signing in with a passkey; an email or text code does not count), and you are returned to the page. If your only second step is a passkey, the box says to sign in again with your passkey and then retry within a few minutes, and offers Sign in again. If you have lost your phone, the box tells you what you can do: verify with an email code and a text code (Verify with email and text codes), or ask your administrator to reset your second factors.
The confirmation lasts only a few minutes.
A factor you add does not confirm the session that added it
Section titled “A factor you add does not confirm the session that added it”A sign-in method that was added during a session cannot prove who is at the keyboard in that same session. Anyone who found your session open could add a method and then use it as proof. So SSOGEN does not count it. If you add your first authenticator and then try to change something else straight away, a box headed Sign in again says: A sign-in method was added to your account after you signed in here, so this sign-in cannot confirm it is you. Sign out and sign in again, then retry within a few minutes. Select Sign out and sign in again, sign in with your new factor, and make the change.

One convenience: if you have just added your first factor and have no recovery codes, you can generate your first set of recovery codes in the same session without a second step.
You are told when your sign-in methods change
Section titled “You are told when your sign-in methods change”When an authenticator, a set of recovery codes, a passkey, or an email address or phone number for sign-in codes is added to your account or removed from it, SSOGEN emails you at your account’s email address. The email names the kind of method, for example “An authenticator app was added to your SSOGEN account”, and says that if it was not you, you should contact your help desk now. It never contains a code or the address or number itself. If your organization has not set up outgoing email, or your account has no email address, no message is sent.
3. Change your password
Section titled “3. Change your password”This changes the password you use to sign in to SSOGEN. If you sign in through your company’s other sign-in service instead, you change your password there.
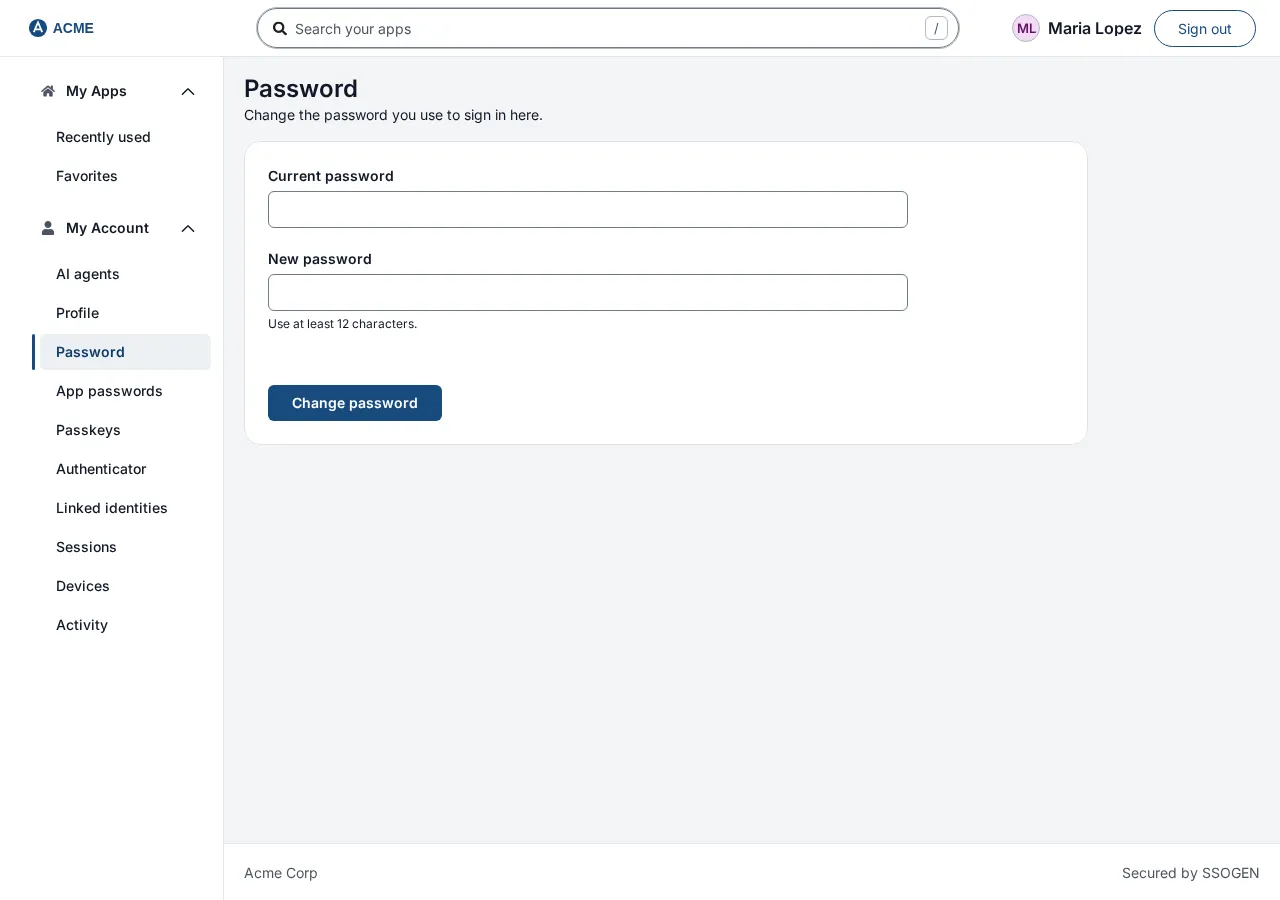
- Open Password in the My Account menu.
- Type your Current password.
- Type your New password. The line under the box states your organization’s rule, for example “Use at least 12 characters.”
- Select Change password.
- A green message appears: Password updated. Use the new password next time you sign in.
If it fails the page says The password was not changed. Check your current password, then try again. Check the current password and that the new one follows the rule shown, then try again.
4. Pair your phone, or add an authenticator app
Section titled “4. Pair your phone, or add an authenticator app”The easiest way to get a second step is to pair your phone with the SSOGEN Authenticator. Once paired, the phone approves your sign-ins and also shows your sign-in codes. You can also use another authenticator app that shows a six-digit code every 30 seconds, if your organization allows it.
Pair a phone
Section titled “Pair a phone”- Install the SSOGEN Authenticator app on your phone; see The SSOGEN Authenticator app.
- In My Account open Authenticator, in the SSOGEN Authenticator section. It starts with “Install the SSOGEN Authenticator app on your phone.” and, when your administrator set them, Get it on the App Store and Get it on Google Play links (each opens in a new tab). If a box asks you to confirm it is you first, do that (section 2).
- Select Pair a phone (with no phone paired the section says No phone paired yet: “Pair a phone to approve sign-ins on it and get your sign-in codes.”). A QR code and a countdown appear. Scan the QR code in the app. If you cannot scan it, open Can’t scan? Copy pairing link and open the link on the phone.
- The page says “A phone is asking to pair” with the phone’s name. Type the code the app shows into Enter the code shown on your phone and select Pair. If it is not your phone, select Not my phone.
- The page says Phone paired. It now shows your sign-in codes and approves sign-ins. The phone is listed in a table with its details and activity, and Codes: on.
In the table, Rename changes the phone’s name (Phone name), and Remove removes it. Removing the phone also removes the codes it shows. A dialog asks to remove that phone by name and explains that it can no longer approve sign-ins or show codes, that waiting requests are canceled and that you will be emailed; select Remove phone. A phone that has not been seen for 90 days is marked and the page suggests removing it if you no longer use it. If the page says Codes could not be set up; contact your administrator. under a phone, the phone paired but your organization has no code key configured; sign-in approval still works.
The codes made by a phone are listed under Your authenticator codes as On and the phone’s name. They have no Remove button of their own; if you try, the page says “These codes belong to a paired phone. Remove the phone to remove them.”
Use another authenticator app
Section titled “Use another authenticator app”This is shown only when your organization allows other apps (the default is SSOGEN Authenticator only).
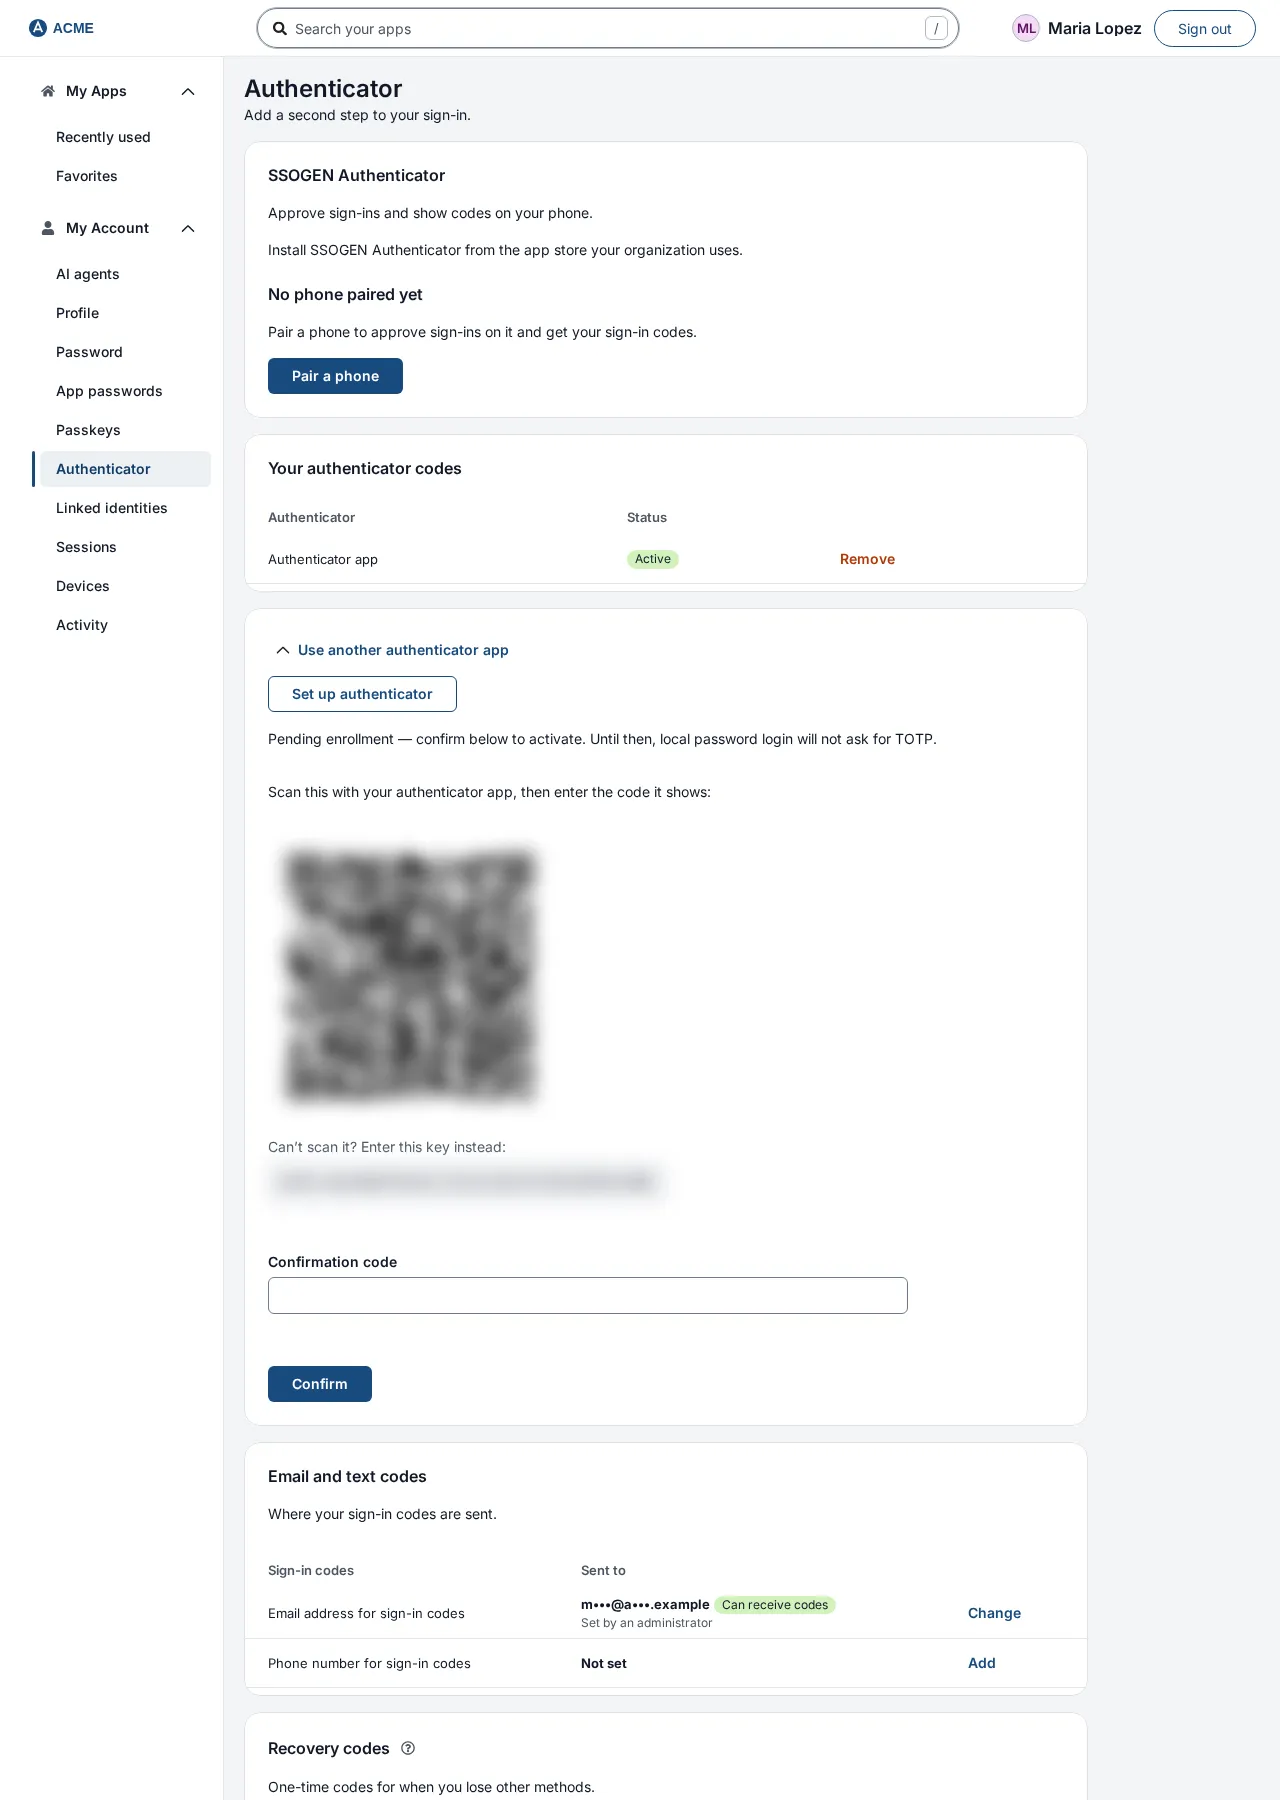
- Open Use another authenticator app and select Set up authenticator.
- The page says “Pending enrollment — confirm below to activate. Until then, local password login will not ask for TOTP.” It shows a square code (a QR code). In your authenticator app choose to add an account and scan it. If you cannot scan it, copy the setup key shown beside it into the app by hand.
- Read the six-digit code your app shows, type it into Confirmation code, and select Confirm.
- A green message appears: TOTP is active. Future local sign-ins will require your authenticator code. The authenticator appears under Your authenticator codes with the status active.
If the code is wrong the page says Code not accepted. Check your app and try again. Check that your phone’s clock is correct, wait for a new code and try again. If you enter something that is not six to eight digits it says Enter a valid authenticator code. If your organization has not set this up, the page says TOTP is not configured on this server. Tell your help desk. If your organization allows only SSOGEN Authenticator, the page says Your organization sets up codes by pairing SSOGEN Authenticator.
Remove an authenticator
Section titled “Remove an authenticator”- On the Authenticator page, find the authenticator under Your authenticator codes and select Remove. (Codes that a paired phone shows are removed by removing the phone.)
- A dialog Remove this authenticator? says: Codes from this app stop working. If it is your only second factor, your password alone protects the account.
- Select Remove authenticator. The page says Authenticator removed.
If you lose your phone, see Signing in, section 6.
5. Add a passkey
Section titled “5. Add a passkey”A passkey lets you sign in with the device you already unlock: your fingerprint or face on a phone or laptop, or a security key. Nothing is typed, so there is nothing to steal or to be tricked out of you. A passkey is a phishing-resistant sign-in method.
- Open Passkeys in the My Account menu. With none the page says No passkeys yet: “Add a passkey for phishing-resistant sign-in on this device.”
- If asked, confirm it is you first (section 2).
- Select Add passkey.
- Your browser or device shows its own prompt (for example “Use your fingerprint” or “Insert your security key”). Follow it.
- The passkey appears in the list.
Messages you may see: Passkeys are not supported in this browser. (use a current browser), Passkey enrollment canceled. (you closed the prompt) and The passkey was not added. Try again, or use another device.
To remove one, select Remove on its row. A dialog Remove this passkey? says: This passkey can no longer sign you in. Your other passkeys keep working. For your last passkey it adds that an application that accepts only passkeys cannot be opened until you add another. Select Remove passkey. If this fails: The passkey was not removed. Try again in a moment.
You sign in with a passkey from the sign-in page; see Signing in, section 3.
6. Where your sign-in codes are sent
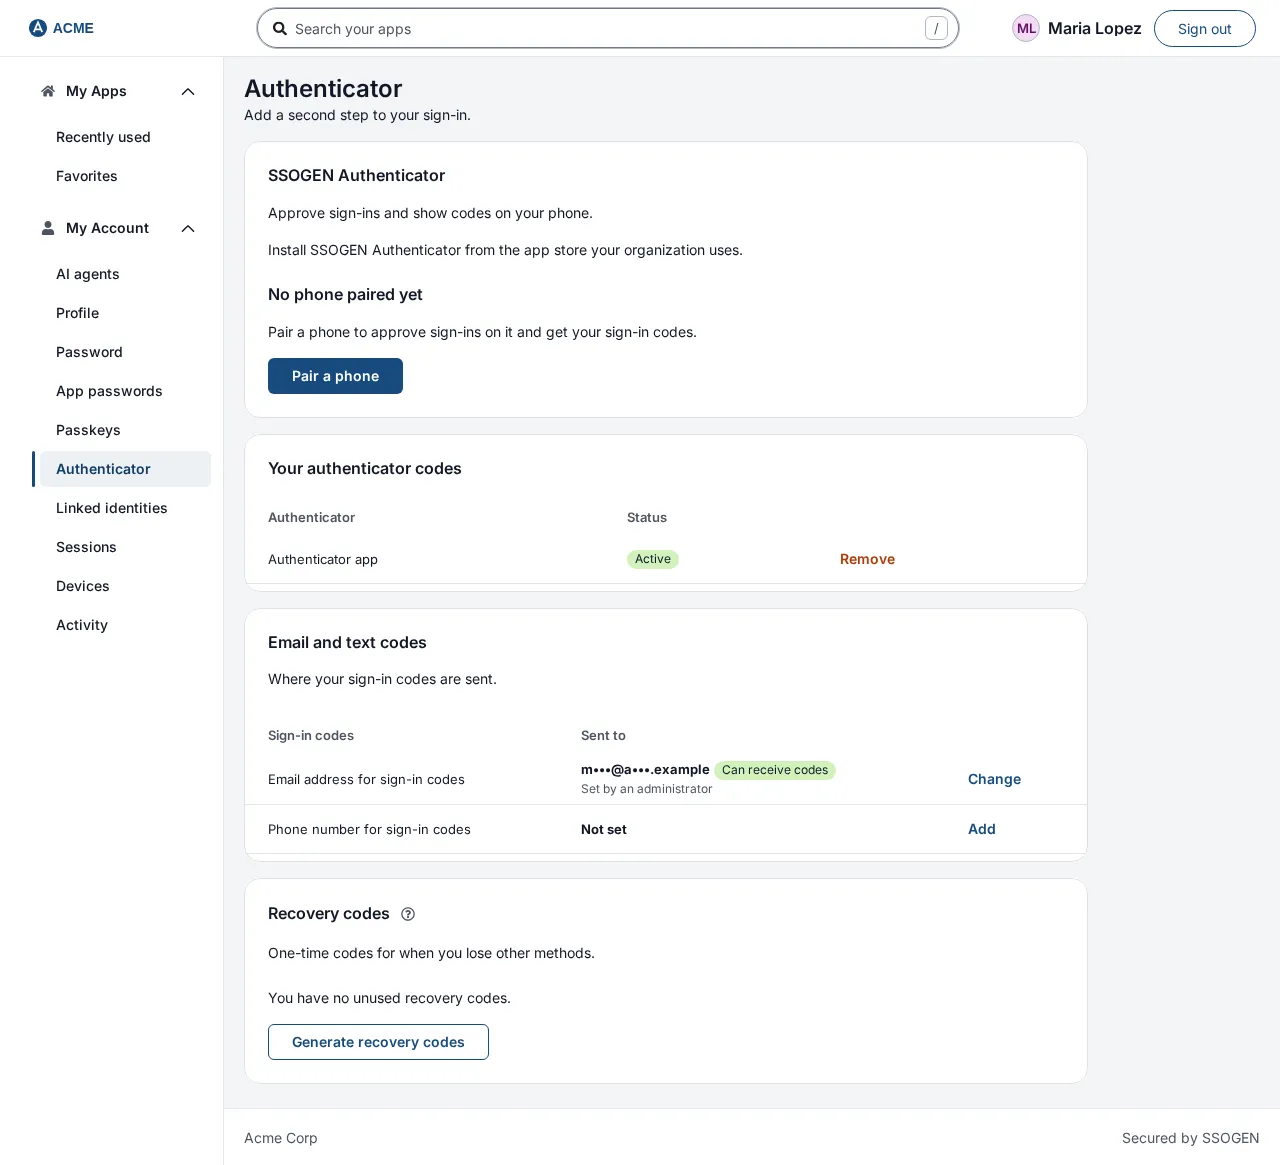
Section titled “6. Where your sign-in codes are sent”Besides an authenticator app, SSOGEN can send a six-digit code to your email address or by text message when you sign in. The Email and text codes section of the Authenticator page shows where it would send them. The section says “Where your sign-in codes are sent.”
There are two cards: Email address for sign-in codes and Phone number for sign-in codes. Each shows the address or number with part of it hidden, a status and where it came from.
| Status | Meaning |
|---|---|
| Can receive codes (green) | Verified and ready. |
| Not verified yet | Not yet checked. Use Send a code to verify. |
| Cannot receive codes | The channel is not usable (for example your administrator has not turned it on). |
| Not set | Nothing on file. |
Under it, a gray line says where the value came from: “From your organization’s directory”, “From your organization’s identity provider”, “Imported by your organization”, “Set by an administrator” or “Entered by you”. If your organization’s directory manages the value you see Your organization’s directory manages this for your account. Ask your help desk to change it. and no change button.
To add or change one:
- Select Add or Change on the card. (If it asks you to confirm it is you first with a second step, do that: your authenticator, or a code sent somewhere other than the contact you are changing.)
- Type the New email address (for example
maria.lopez@acme.example) or New phone number (with the country code, for example+1 555 123 4567). The help line says: We send a code to it, and it is used for sign-in codes only after you enter that code. - Select Save and send a code.
- A Code box appears: “Enter the six digits sent to” the address or number, shown partly hidden. Type the code and select Verify. If it did not arrive, select Send a new code.
- The status becomes Can receive codes.
Messages you may see:
| Message | What to do |
|---|---|
| That does not look like an email address. | Check it. |
| That does not look like a phone number. Include the country code, for example +1 555 123 4567. | Add the country code. |
| Codes cannot be sent to phone numbers in that country. | Use another number or an email address. |
| That code is not right, or it has expired. Check it, or send a new code. | Request a new code. |
| Too many attempts. Wait a little, then try again. | Wait a few minutes. |
| We can’t send codes right now. Try again later or contact your help desk. | Tell your help desk. |
| Too many wrong codes. Sign-in codes are locked for your account for 15 minutes. | Wait 15 minutes. |
| Your organization’s directory manages this value. Ask your help desk to change it. | Ask your help desk. |
| Your sign-in contacts could not be loaded. | Reload the page. |
7. Recovery codes
Section titled “7. Recovery codes”Recovery codes are one-time codes you keep somewhere safe. If you lose your phone, each one can stand in for your second step once. If your organization does not use recovery codes, the section says This deployment does not use recovery codes and “If you lose your second factor, an administrator can reset it for you.”
- Open Authenticator in the My Account menu, then the Recovery codes section. It says “One-time codes for when you lose other methods.” and how many unused codes you have (“You have 10 unused recovery codes. Each works once.”).
- If a box asks you to confirm it is you first, do that (section 2).
- Select Generate recovery codes.
- A dialog Generate new recovery codes? warns: Every current recovery code stops working. The new set is shown once. (When you have none left it says nothing stops working.) Select Generate new codes.
- A message says Recovery codes rotated (10). Store them offline; they are shown once. and the codes appear in a list, with the note “Copy and store these codes now. They will not be shown again.”
- Print them or save them in your password manager. Do not keep them in the same place as your password.
To use one, see Signing in, section 4. If it fails: Unable to rotate recovery codes.
If a page will not load
Section titled “If a page will not load”A list that cannot be read shows a notice, for example for your passkeys, with a Try again button. If your role is not allowed to see it, the notice says Your role doesn’t allow this. Select Try again, or reload the page. If it keeps failing, tell your help desk.
Related guides: My Account: sessions and activity, Signing in, Using My Apps.