Install SSOGEN and complete first-run setup
To install SSOGEN, an SSO and identity provider server, you unpack the release, run the installer on a Linux server and finish a setup screen. The steps are the same for an evaluation, a pilot and a production server:
- Run the installer. It prepares the database, the keys and the service, and writes a one-time setup token.
- Complete the setup screen in a browser. It creates the first administrator.
There are no database scripts to run and no sample data to import. Everything else (people, identity providers, applications) is configured afterwards in the Admin Console.
Before you start
Section titled “Before you start”You need:
| Item | Requirement |
|---|---|
| A server | Red Hat Enterprise Linux, Oracle Linux, Rocky Linux, AlmaLinux or CentOS Stream, version 8, 9 or 10, with systemd and sudo. |
| A database | PostgreSQL 15 or later. The installer sets up a local one, or you give it an empty database that your database administrator created. |
| A name | The address people will type, for example https://sso.acme.example. SSOGEN calls this the canonical origin. It is fixed at install time, must start with https:// and cannot be an IP address. |
| A TLS certificate | Nothing to supply. SSOGEN always serves HTTPS on its own port (9941 by default) with a certificate the installer generates. A load balancer in front, if you use one, holds the certificate your users’ browsers trust. |
| The release | The ssogen-platform archive (a .tar.gz file) and its .sha256 file. |
| Outbound access, only if you use relay certificates | If you run SSOGEN on your own servers and a Gateway group uses an Uplink relay, SSOGEN orders its certificates automatically and needs outbound HTTPS to the certificate authority (Let’s Encrypt by default) and to its certificate-transparency search. The installation guide in the release lists the addresses and settings. See Reach a Gateway through a relay. |
| An authenticator app | On your phone, for the administrator’s second step: any app that produces time-based codes (TOTP). |
Step 1. Run the installer (On the server)
Section titled “Step 1. Run the installer (On the server)”Check the archive against its .sha256 file, unpack it and go into the folder it creates:
sha256sum -c ssogen-platform-<version>-<date>.tar.gz.sha256tar -xzf ssogen-platform-<version>-<date>.tar.gzcd ssogen-platform-<version>-<date>Then run the installer three times, with the address people will type. --check and --plan change nothing; --apply shows the plan again and asks before it acts.
sudo ./install.sh --check --origin https://sso.acme.example:9941sudo ./install.sh --plan --origin https://sso.acme.example:9941sudo ./install.sh --apply --origin https://sso.acme.example:9941With a load balancer on port 443 in front, give the address without a port and add --trusted-proxy with the balancer’s addresses; the installation guide explains this.
The installer:
- installs Java 21 and PostgreSQL from your operating system’s repositories if they are missing (or use your own empty database with
--no-postgres); - creates the database, the service account and the
ssogenservice (ssogen-platformremains as its alias); - generates the four secret keys that SSOGEN keeps outside the database, the signing keystore and the HTTPS certificate for SSOGEN’s own port;
- writes the settings to
/etc/ssogen/ssogen-platform.envand starts the service.
On the first start SSOGEN creates all of its tables, your realm, the built-in local-db identity provider (SSOGEN’s own usernames and passwords), the Everyone group and two signing keys, and writes the setup token to /var/lib/ssogen/bootstrap-token.
Check that it is ready. On the server (if you gave a port in the origin, such as :9941, include it in every address on this page):
curl -k -H 'Host: sso.acme.example' https://127.0.0.1:9941/health/readyIt answers with status 200 when SSOGEN can serve requests. It answers 503 while the database is unavailable or a key is inconsistent. The Host header must be the canonical name; any other host gets 421.
Settings you may change later, such as the trusted load balancers (SSOGEN_TRUSTED_PROXY_CIDRS) or the network zones that policies can use (SSOGEN_POLICY_NETWORK_ZONE_CIDRS; see the glossary), are lines in /etc/ssogen/ssogen-platform.env. After a change, run sudo systemctl restart ssogen-platform.
Step 2. Complete the setup screen
Section titled “Step 2. Complete the setup screen”-
On the server, read the token file:
sudo cat /var/lib/ssogen/bootstrap-tokenThe token is a long string of 64 to 128 characters with no spaces. Treat it like a password.
-
In a browser, open
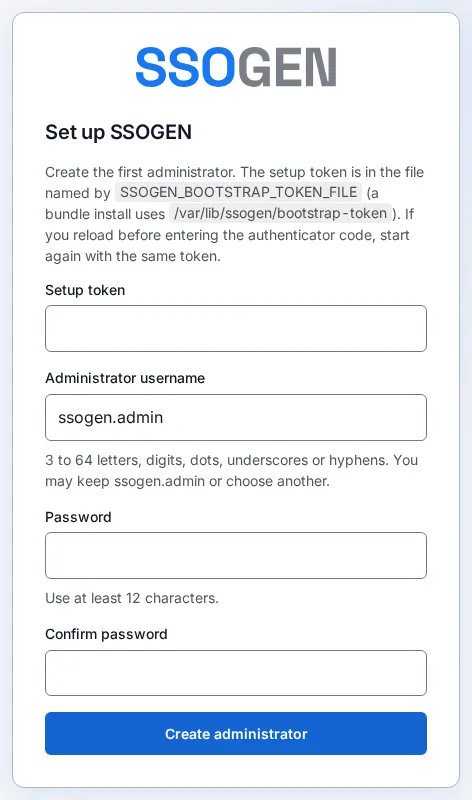
https://sso.acme.example/setup. Type the address exactly as inSSOGEN_CANONICAL_ORIGIN. Setup refuses to work from any other address.You should see a card titled Set up SSOGEN with the sentence “Create the first administrator.”
-
Fill in the form:
Field What to enter Example Setup token The whole token from the file. (a 64+ character string) Administrator username Already filled in as ssogen.admin. You may keep it or choose another: 3 to 64 letters, digits, dots, underscores or hyphens.ssogen.adminPassword Long enough for the rules the form shows; the form accepts up to 256 characters. Blue-Harbor-Lantern-42Confirm password The same password again. Blue-Harbor-Lantern-42 -
Select Create administrator.
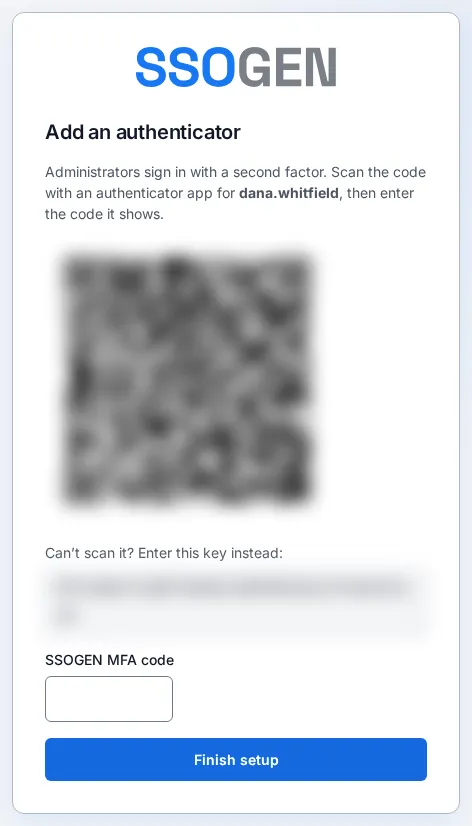
You should now see Add an authenticator, with a QR code and the sentence “Administrators sign in with a second factor.”
-
On your phone, open your authenticator app and add an account by scanning the QR code. The app now shows a 6-digit code that changes every 30 seconds.
-
Type the current code into SSOGEN MFA code and select Finish setup.
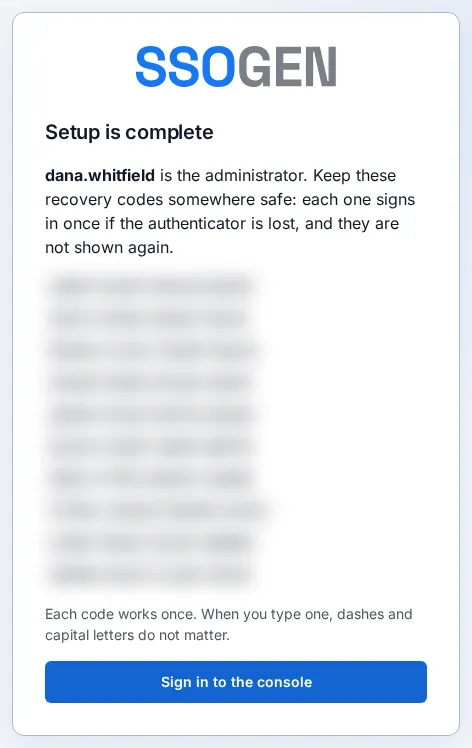
You should now see Setup is complete and a list of recovery codes.
-
Save the recovery codes now. Each signs you in once if you lose your phone. They are shown only this once. Store them in your password manager or a safe, then select Sign in to the console.
What setup did: the administrator exists, holds the Super admin role, has an authenticator, and the setup token file was deleted. The /setup address now refuses to do anything; opening it shows Setup is already complete.
If setup shows an error
Section titled “If setup shows an error”| What you see | What it means and what to do |
|---|---|
| “Paste the whole setup token from the file the server wrote.” | The token field is not 64 to 128 characters without spaces. Copy the whole token again. |
| “The username must be 3 to 64 letters, digits, dots, underscores or hyphens.” | Fix the username. |
| “The password must be N to 256 characters.” | Choose a password within that length (N is the minimum the form shows). |
| “The two passwords do not match.” | Retype both. |
| “The administrator was not created. Check the password rules and the setup token; a token older than 24 hours needs a restart.” | The password broke a rule, or the token was already used, has expired or was mistyped. If the token is older than 24 hours, restart SSOGEN; it writes a new token to the same file. Use that one. |
| “Open this page at SSOGEN’s own address, then try again.” | You opened /setup through a different name or address than SSOGEN_CANONICAL_ORIGIN. Use the canonical address. |
| “Too many attempts. Wait a minute and try again.” | Setup limits repeated attempts. Wait, then retry. |
| “SSOGEN could not be reached. Nothing was changed.” | The browser could not reach the server. Check the address and that SSOGEN is running. |
| “That code was not accepted. Enter the current code from your authenticator app.” | Wait for the next code and enter it. Check that your phone’s clock is set automatically. |
| “The authenticator could not be started. Start again with the setup token; one older than 24 hours needs a restart.” | Setup was interrupted. Start again with the token; if it is older than 24 hours, restart SSOGEN and use the new one. |
| “Setup is not available” and “SSOGEN is still starting. Reload this page in a moment.” | SSOGEN has not finished starting. Wait and reload. |
If you reload the page between creating the administrator and entering the first code, open /setup again and enter the same token; no restart is needed, and the new attempt replaces the unfinished one. Only a token older than 24 hours needs a restart of SSOGEN, which writes a new one. The unfinished account is removed when setup completes.
What setup creates for you
Section titled “What setup creates for you”You do not have to build sign-in rules before the first administrator can use the console. Setup and the installer create these, and you can change them later:
| What | What it is | Where to change it |
|---|---|---|
| Default sign-in policy | The policy for My Apps and for every application that has no policy of its own: the SSOGEN Directory (SSOGEN’s own usernames and passwords), a second factor, and passkeys allowed. “Email me a sign-in link” and “Sign in with your phone” are off; turn them on in this policy, not in the Admin Console’s. | SSO policies, Defaults |
| Administrator sign-in policy | A separate policy for the Admin Console and the only rule for opening it: the SSOGEN Directory, a password and then an approval in the SSOGEN Authenticator (with number matching), its code or a recovery code, with passkeys allowed, and a new sign-in after an hour. It never offers phone sign-in, an emailed link or a remembered browser. The administrator you just created meets it with the authenticator scanned during setup. | SSO policies, Defaults (Administration console) |
| SSOGEN Directory | The built-in store of accounts whose passwords SSOGEN keeps. The first administrator is in it. | Identity, Users |
| Everyone group | A system group of every active person. It cannot be renamed or deleted. | Identity, Groups |
| A certificate authority for Web Agents and Gateways | The installer creates it, so Web Agents and Gateways need no hand-made authority and you do not have to do anything about it. Setup health tells you if it is missing. | Nothing to change |
| Signing keys | The installer generates the keys SSOGEN signs sign-in messages with. | Settings, Certificates |
An upgrade changes none of these on a server that already has its own. On an upgraded server whose Admin Console has no policy, the first start gives it Administrator sign-in when a Super admin can meet it.
Step 3. Sign in to the Admin Console for the first time
Section titled “Step 3. Sign in to the Admin Console for the first time”- Open
https://sso.acme.example/admin/. - On the sign-in page, enter your username (
ssogen.admin) in Email or username and select Next. - Enter your password and select Sign in.
- When asked for a second step, type the current code from your authenticator app (the field is labeled SSOGEN MFA code), then select Verify if it is shown as its own screen titled Multi-factor authentication. If you lost your phone, use a recovery code instead; the sign-in page offers it as Or recovery code, or as Recovery code under “Other ways to verify”.
- The Admin Console opens in admin mode with no further prompt: your sign-in met the console’s policy. Admin mode ends after 15 minutes without use, and after 60 minutes however busy you are; it then comes back by itself while your sign-in still meets the policy. After an hour the console asks you to sign in again. An administrator can change the admin mode times in Settings, Security.
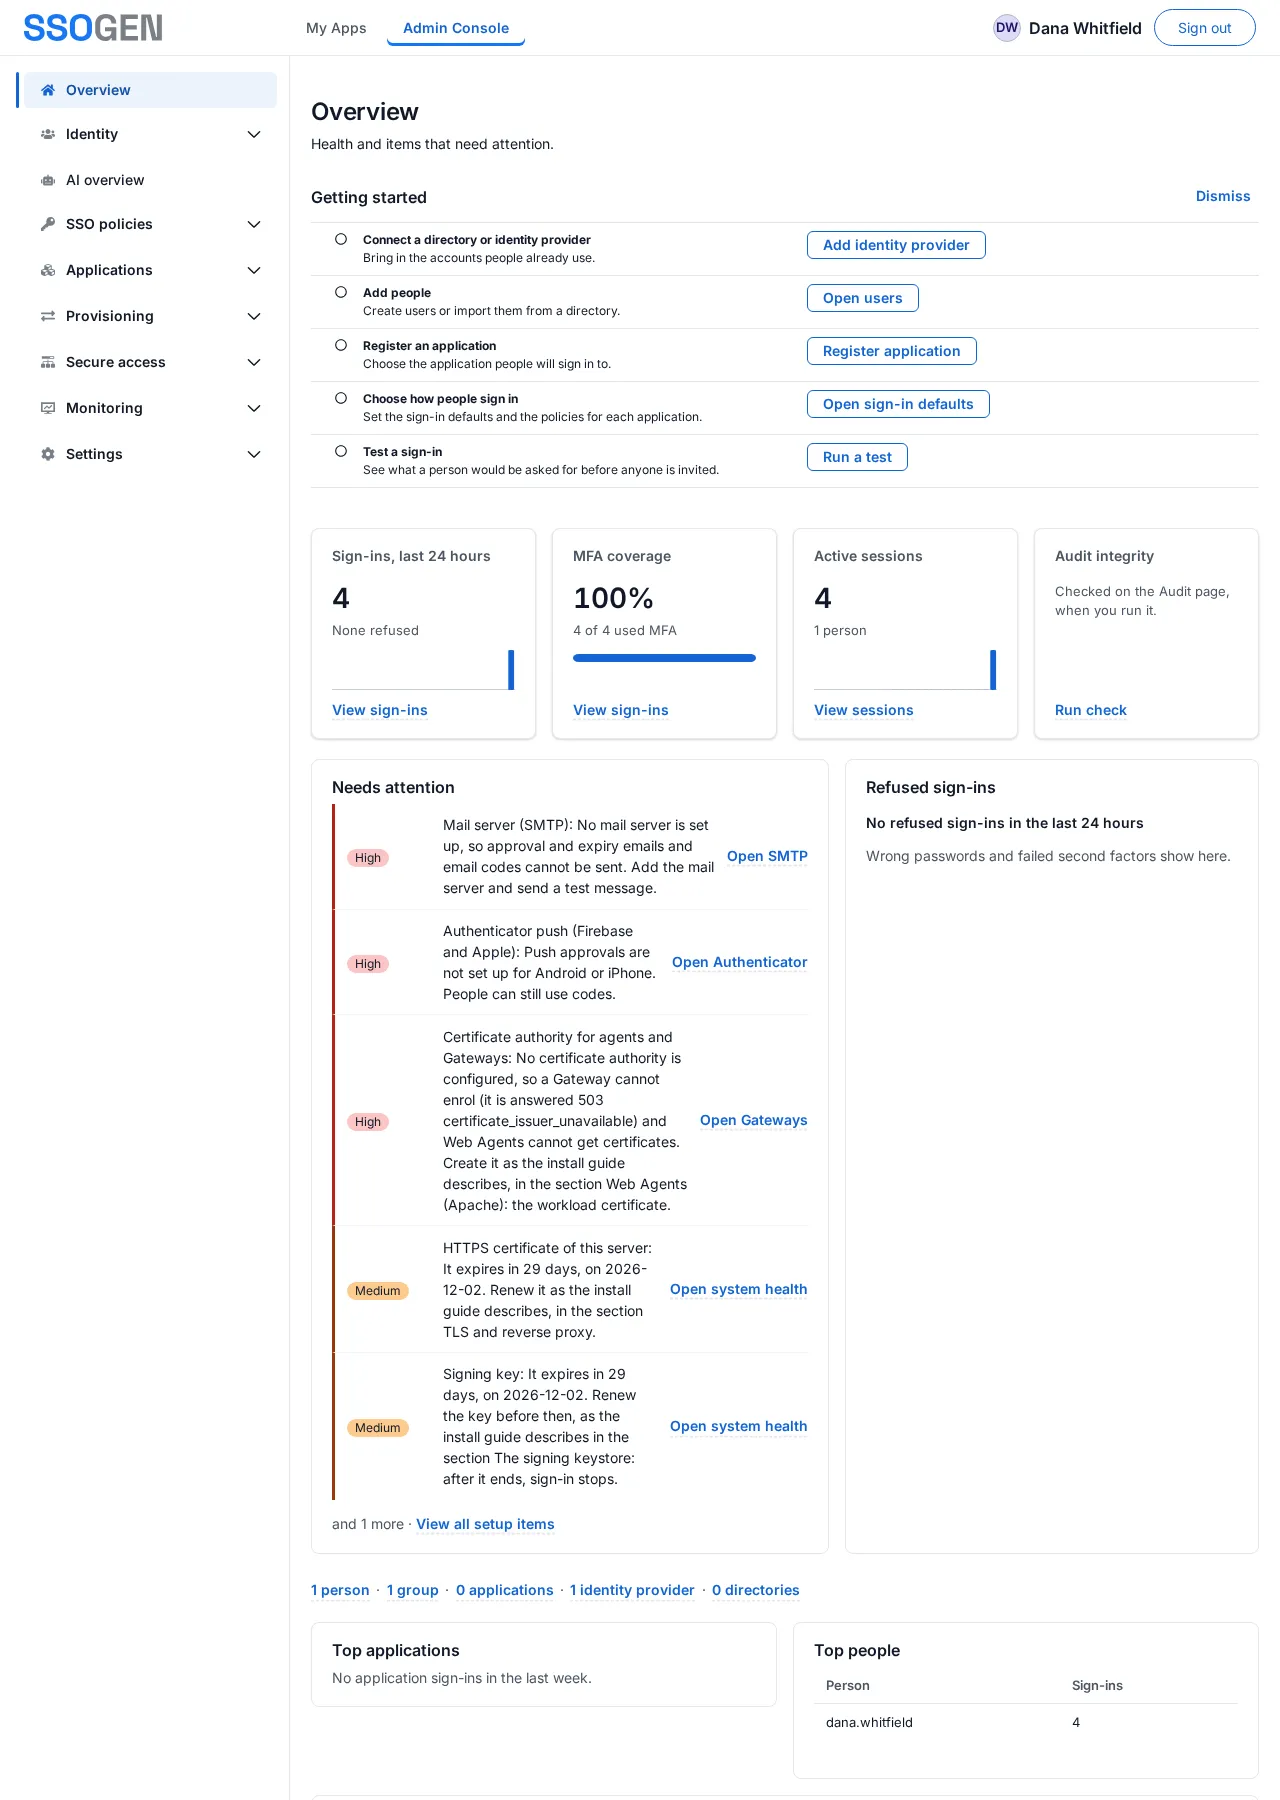
You should now see the Overview page: key figures for sign-ins, MFA coverage, active sessions and audit integrity, the Needs attention and Refused sign-ins cards, and, on a new installation, a Getting started card with five first steps. There are no applications yet.
| If you see | Do this |
|---|---|
| “Your username or password is incorrect.” | Retype them. The message is the same whether the username or the password is wrong. |
| “That code didn’t work. Check it and try again.” | Enter the current code, not an old one. |
| “Too many attempts. Try again in N minutes.” | The second step is locked for a short time after repeated wrong codes. Wait. |
| “Set up your authenticator” | The account has no second factor yet. Follow the page, then sign in again. |
Step 4. First settings every deployment should make
Section titled “Step 4. First settings every deployment should make”Open each of these in the sidebar. The Admin Console tour explains every item; this is only the short list to do first.
- Settings, Branding. Set the Company name (
Acme Corp), the Sign-in heading and Line under the heading (for example “Sign in with your Acme account”), the Accent color, the Logo and Favicon, and optionally the Support link address and Privacy notice address. Select Save branding. Branding appears on every sign-in page. - Settings, Security. Review session lifetimes. By default a signed-in session ends after 30 minutes without use and after 12 hours at most. Admin mode defaults are in step 3. The page is grouped into: Admin access, Sign-in protection, Sessions, Accounts and recovery, Directories, Sign-in codes, and Data retention and deletion.
- Settings, SMTP. Enter your mail server so SSOGEN can send password-reset links and email sign-in codes. (Text-message codes are set up on SMS.)
- Identity and SSO policies. Add your people (Users), or connect your directory (Directories) or another identity provider (Identity providers).
- Settings, Admin roles. Give a second person an administrator role, so the deployment does not depend on one account.
Start over
Section titled “Start over”SSOGEN has no reset button, on purpose. To start an installation again: take a backup if anything in it matters, uninstall with sudo /opt/ssogen/install.sh --uninstall --purge-data (the installation guide describes it), and go back to Step 1. The old audit log survives only in the backup.
What an empty installation contains
Section titled “What an empty installation contains”After step 1 and before setup, a new installation holds: your realm, the Everyone group, the local-db identity provider, two signing keys, the built-in administrator roles, and no users, applications, policies or audit events. After setup it also holds the first administrator, their authenticator and recovery codes, the Super admin role, and the first audit events.