How to sign in with SSO for the first time
To sign in with SSO for the first time, you type your email address or username, add a second step if asked, and land on a page of your applications. This guide is for employees, and for administrators who want to check what employees will see. It follows Maria Lopez, an employee of Acme Corp, signing in for the first time. Her sign-in address is maria.lopez@acme.example, and her company’s SSOGEN is at https://sso.acme.example.
Before Maria can sign in, an administrator must have created her account (or connected the company directory she already belongs to) and given her at least one application. If you are the administrator, see the Admin Console tour first.
Step 1. Open the sign-in page
Section titled “Step 1. Open the sign-in page”Open https://sso.acme.example/ in your browser. If you are not signed in yet, you are taken to the sign-in page. You can also open https://sso.acme.example/login/ directly.
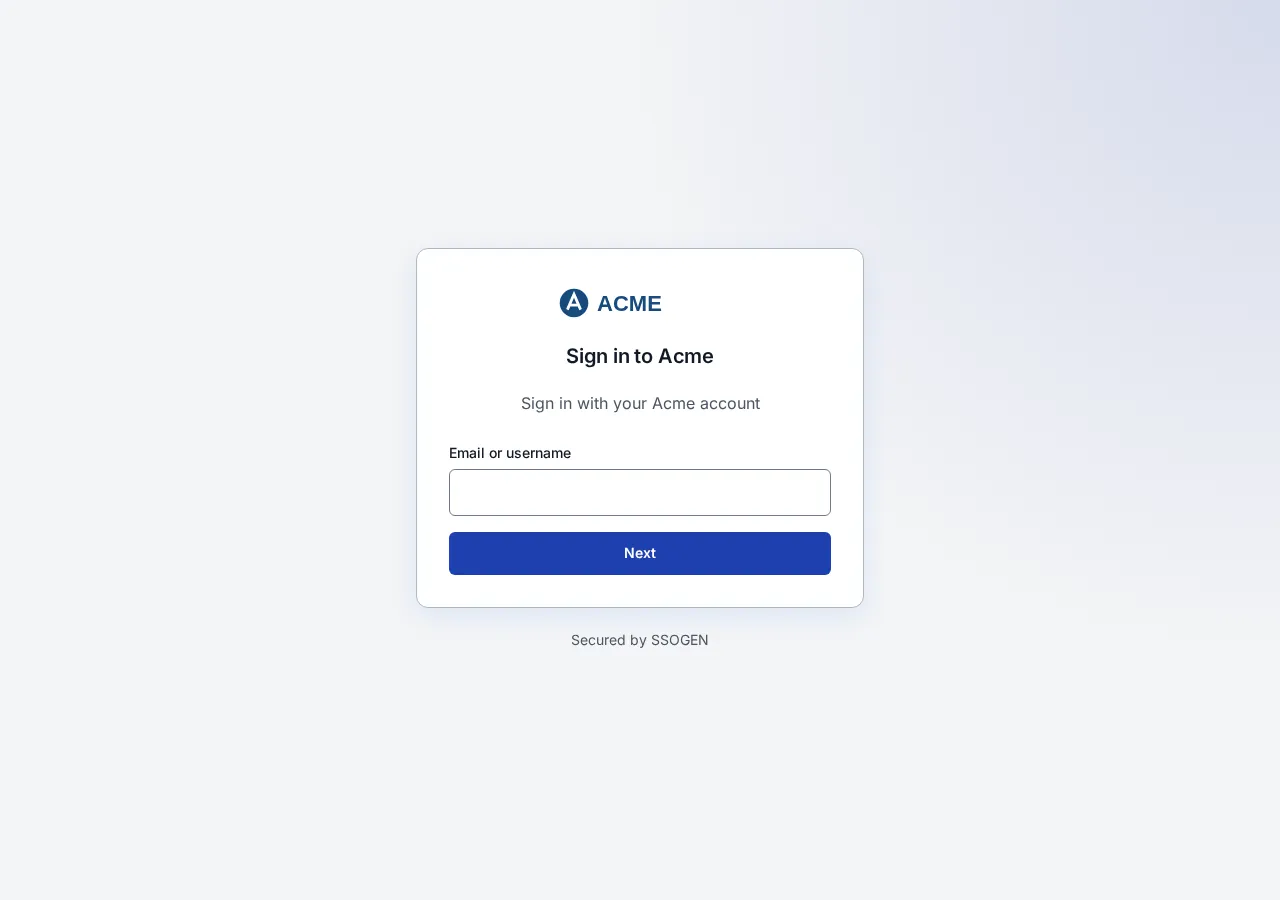
The page shows your company’s logo and name, and the heading and line of text your administrator chose. Depending on your company’s settings it can also offer Sign in with passkey, Sign in with your phone and Email me a sign-in link; see Signing in, section 3.
Step 2. Say who you are
Section titled “Step 2. Say who you are”- Type your email address or username in Email or username. Maria types
maria.lopez@acme.example. - Select Next.
SSOGEN now knows which way to check you. What you see next depends on how your company set things up. Find your case below.
Case A. You type a password into SSOGEN
Section titled “Case A. You type a password into SSOGEN”You see a Sign in heading and your name in the line “Signing in as maria.lopez@acme.example”. If you typed the wrong name, select Not you? to go back.
- Type your password in Password. Some companies call it something else, for example “Acme SSO ID” and “Acme password”; the labels on your screen are the ones to follow.
- Select Sign in.
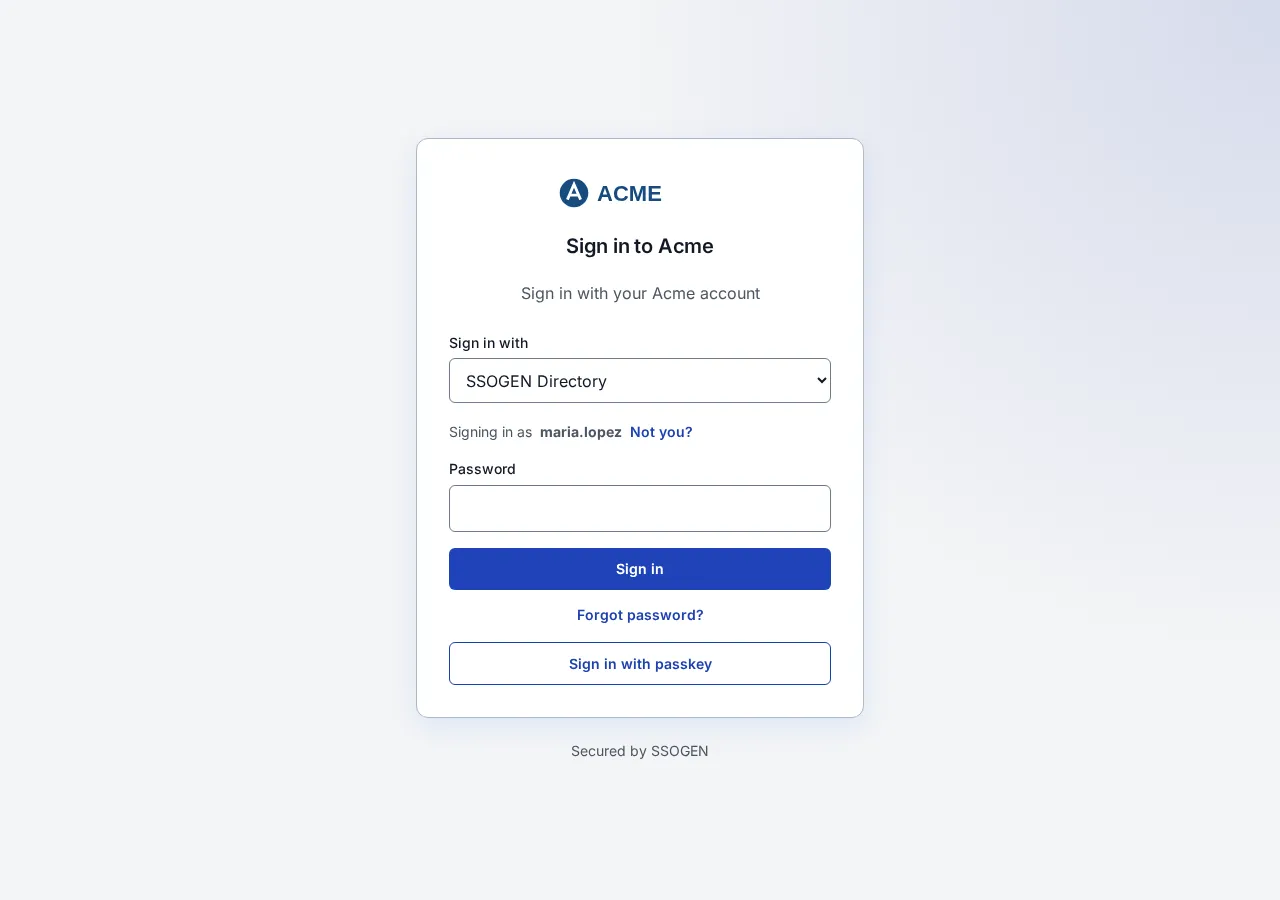
If your company has more than one way to sign in, a drop-down named Sign in with is shown first. Choose the one your company told you to use, for example “Acme directory” for your normal work account.
Case B. You are sent to your company’s other sign-in service
Section titled “Case B. You are sent to your company’s other sign-in service”Your company may use Microsoft Entra ID, Okta, Keycloak or similar. The button reads Continue to followed by its name, for example Continue to Acme Entra ID. Select it. You are taken to that service’s own sign-in page, where you sign in as you normally do. When you finish, you come back to SSOGEN automatically.
Case C. Your administrator required a password change
Section titled “Case C. Your administrator required a password change”You see “This account needs a new password before it can sign in.” Type your current password in Current password, then a new one in New password and again in Confirm new password, and select Update password. The new password must meet the password rules shown on the page. After it is accepted, sign in with the new password.
Step 3. The second step
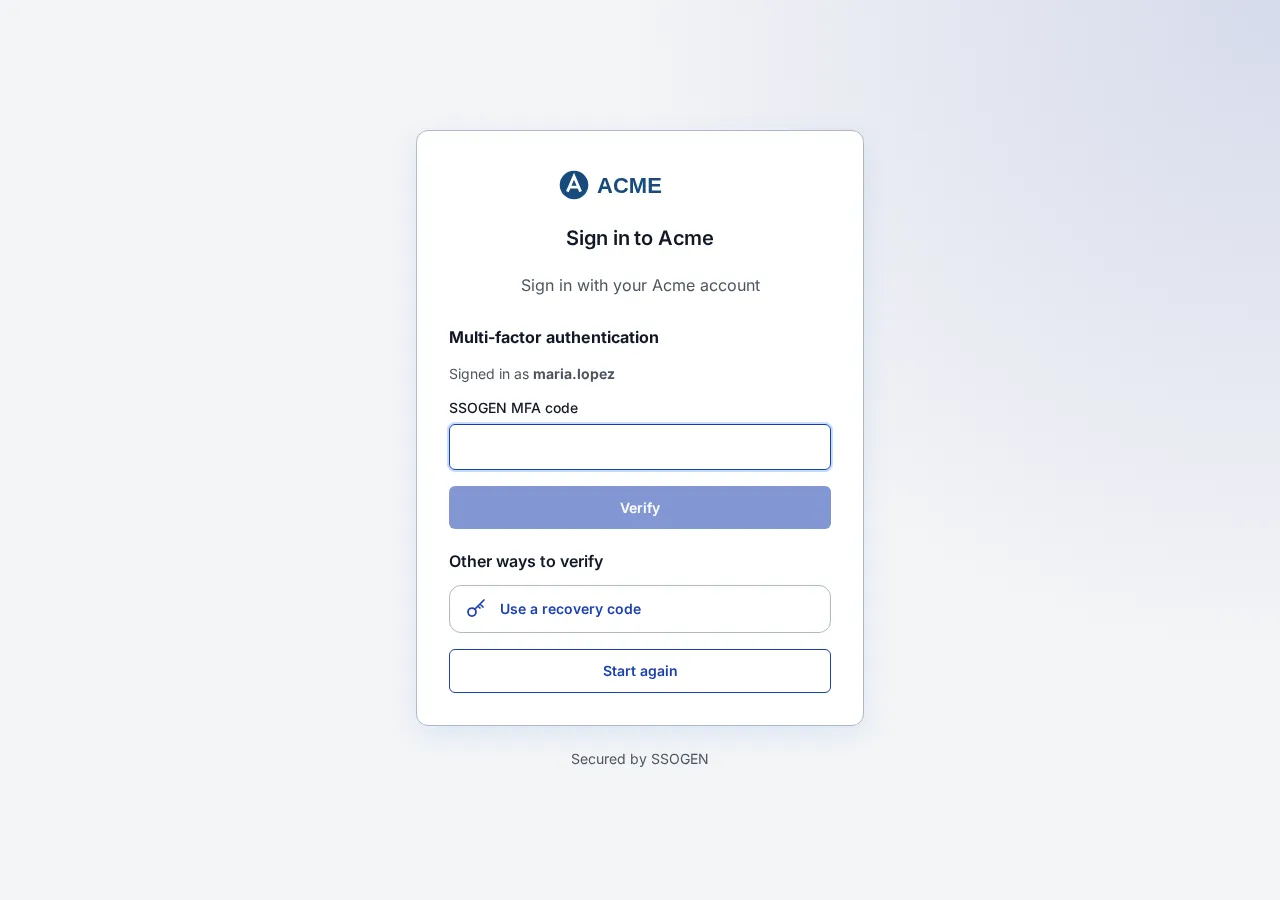
Section titled “Step 3. The second step”Many companies require a second step. If yours does, SSOGEN asks for it on a screen. If you have paired your phone with the SSOGEN Authenticator, the screen is headed Approve sign-in on your SSOGEN Authenticator and shows one number: open the request on your phone, tap the matching number among the six shown, and confirm with your fingerprint, face or screen lock (Approve a sign-in on your phone). Otherwise the screen is titled Multi-factor authentication, which shows “Signed in as” and your name.
Use the method shown first:
| The screen says | What to do |
|---|---|
| SSOGEN MFA code | Open your authenticator app on your phone, find the SSOGEN entry, type the 6-digit code, and select Verify. Codes change every 30 seconds. |
| Send a code (with “Send a code to” your masked email address, or “Text a code to” your masked phone) | Select Send a code. Then type the code you receive in Verification code and select Verify. If it does not arrive, wait for the Resend in N s button to count down to Resend code; there is a short wait between requests. |
| Recovery code | Type one of the one-time recovery codes you saved. Each works once. |
Other methods you are allowed are listed under Other ways to verify: Authenticator app, Recovery code, Email a code, Text a code. Which appear depends on your company’s policy.
If you have no second step set up yet but the policy needs one, SSOGEN says: “This sign-in needs a second step, and no method is set up for your account. Contact your help desk.” Your administrator can fix this; see “If something goes wrong” below.
When your company’s policy offers it, SSOGEN instead shows Set up your second step right after your password. It sends a code to your email address (or a text message to your phone number) on file; type it in Verification code, then scan the code it shows with your authenticator app and type the 6-digit code the app shows. After a reset by your administrator this offer is open for a limited time (72 hours unless your administrator changed it). An administrator who has no second factor yet does the same at the Admin Console’s sign-in, not under My Account.
Step 4. My Apps
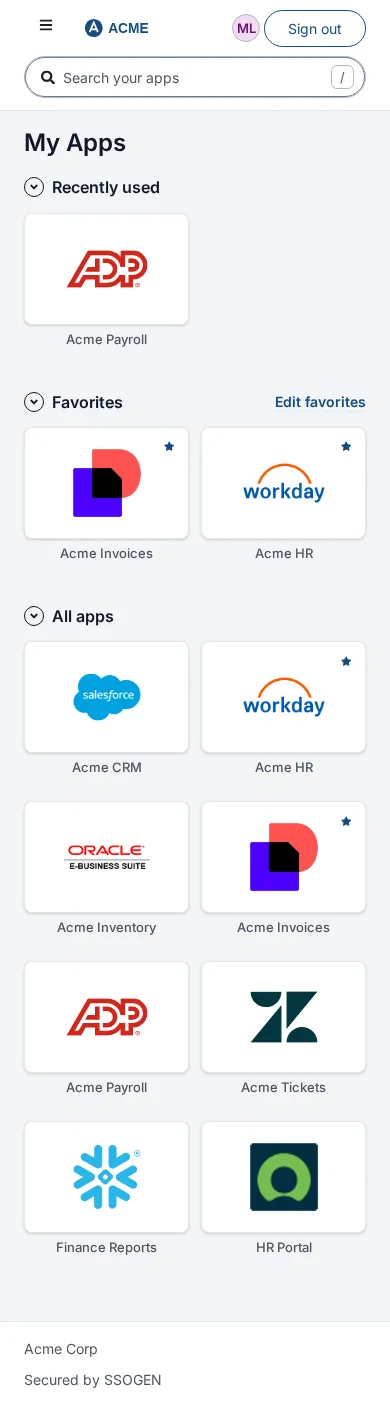
Section titled “Step 4. My Apps”After sign-in you arrive at My Apps (the home page, /). This is your page of applications. The top bar has the search box, your name and Sign out; the menu on the left holds My Apps and My Account.
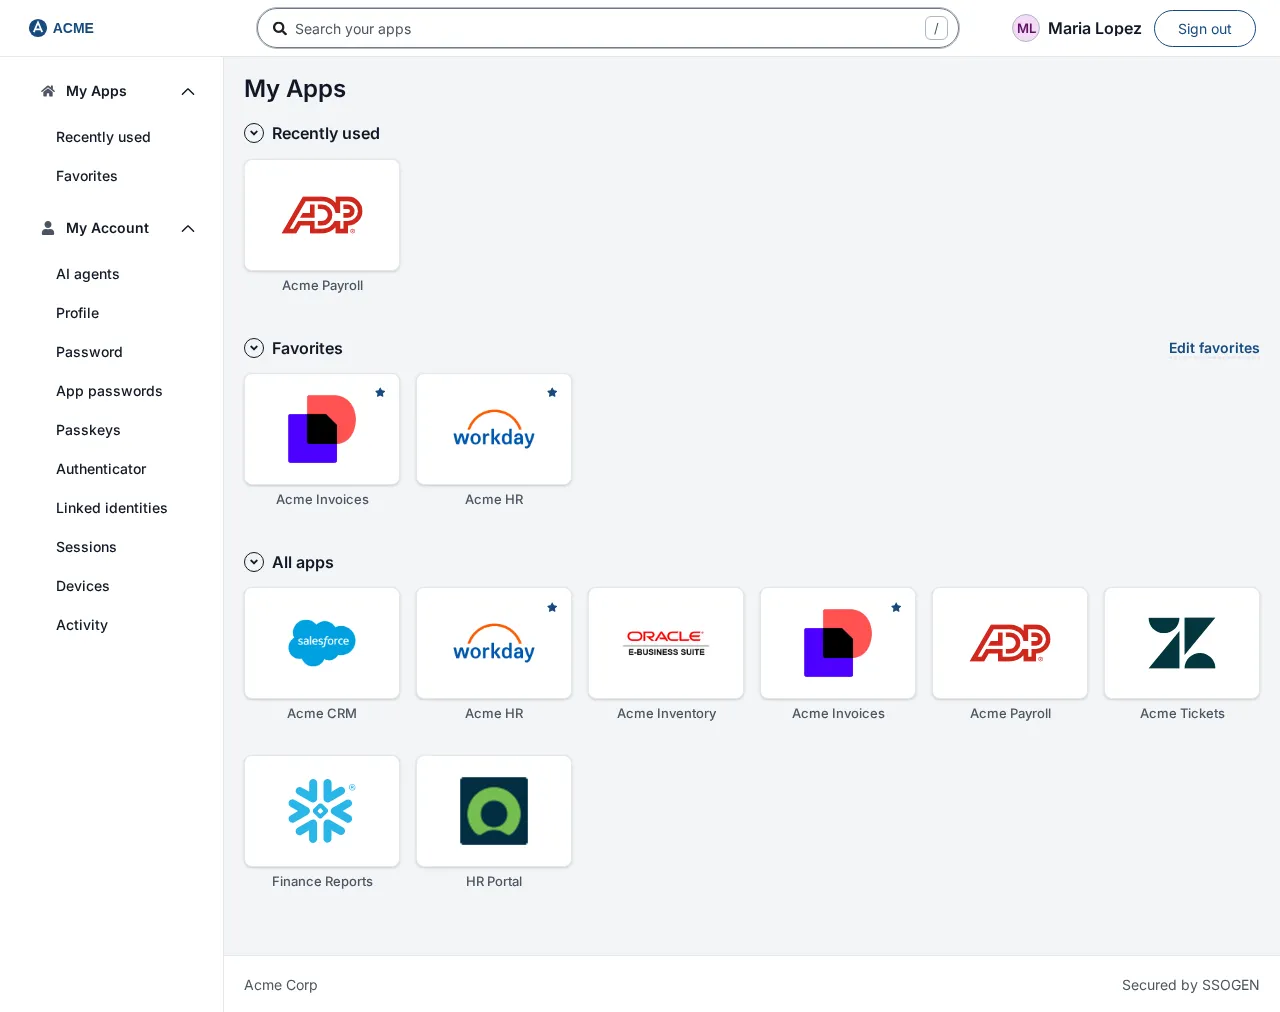
- Each application you have been given is a tile with its logo (or its first letter) and its name. Select the tile to open the application. You do not enter its password again.
- Search your apps at the top narrows the tiles as you type. Press / to jump to it.
- The star on a tile adds it to Favorites (“Add name to favorites”); select it again to remove it. Under Favorites, Edit favorites shows small arrows that move a tile earlier or later.
- Recently used shows the applications you opened most recently. Below it, your other applications are grouped by the categories your administrator chose.
My Apps also works on a phone.
A tile that cannot be opened right now is grayed and has a label:
| Label | What it means |
|---|---|
| Unavailable | “This application is switched off for now. Try again later or ask your administrator.” (or “This application is not available right now. Please ask your administrator.”) |
| Not set up yet | “Your administrator has not finished setting this application up.” |
If you see No apps assigned yet, the page says “Contact your administrator to get access to applications.” Nothing is wrong with your sign-in. If a search finds nothing it says No matching applications; try different words.
When you select a tile and the application does not open, a message appears on the tile. The common ones:
| Message | What to do |
|---|---|
| “You are not assigned to this application.” | Ask your administrator for access. |
| “No sign-in method is allowed for this application yet. Please ask your administrator.” | The application is not fully set up. Tell your administrator. |
| “Access to this application is not allowed.” | Your policy does not permit it from here or now. Ask your administrator. |
| “This application asks for a stronger sign-in than it can offer you. Please ask your administrator.” | You may need a passkey or another stronger method. |
| “Additional verification was not completed, so the application was not opened. Try again.” | The application wanted one more check and it was not finished. Open it again and complete the check. |
| “That verification step has expired or was already used, so the application was not opened. Open it again from My Apps.” | Select the tile again. |
| “This application has no launch URL configured yet.” / “This application’s launch address is not valid. Please ask your administrator.” | Tell your administrator. |
Step 5. Look at My Account and strengthen your sign-in
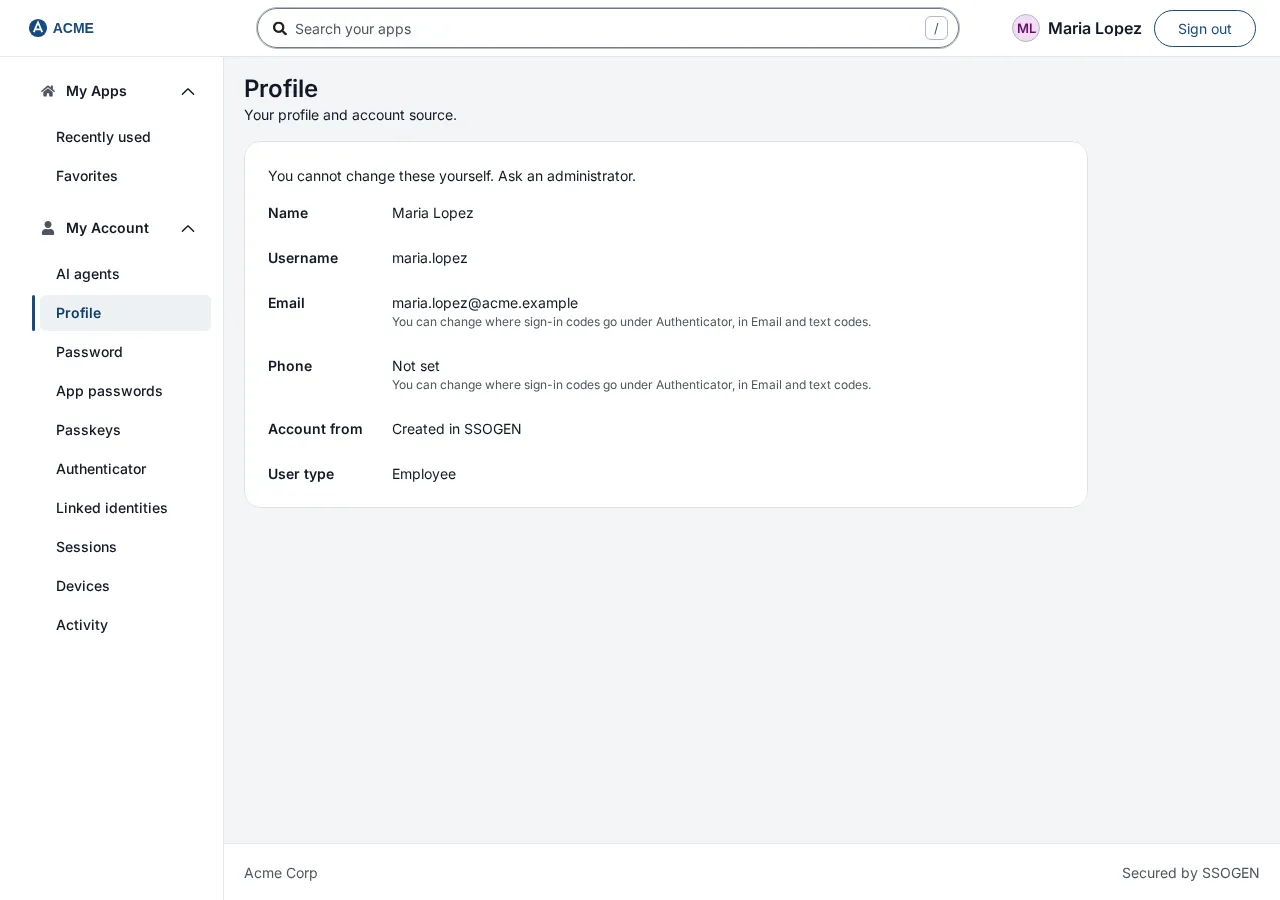
Section titled “Step 5. Look at My Account and strengthen your sign-in”There is no separate account page. My Account is the second group in the left menu of the home page, under My Apps. It is one list: AI agents, Profile, Password, App passwords, Passkeys, Authenticator, Linked identities, Sessions, Devices and Activity. Your name and a Sign out button are at the top right.
| Page | What it is for |
|---|---|
| Profile | “Your profile and account source.” Who you are signed in as, where your account comes from, and what you can change yourself. |
| Password | “Change the password you use to sign in here.” |
| App passwords | “Passwords SSOGEN uses to sign you in to applications.” |
| Passkeys | “Sign in with this device.” |
| Authenticator | “Add a second step to your sign-in.” Your paired phone and authenticator codes, where sign-in codes are sent, and recovery codes. |
| Linked identities | “The sign-in methods linked to this account.” |
| Sessions | “Where you are signed in.” Each row shows the IP address it signed in from, and you can sign out of any session. |
| Devices | “Browsers you have signed in on.” |
| Activity | “Recent sign-ins and changes to how you sign in.” |
| AI agents | “AI agents you allowed to act for you.” You can withdraw them at any time. |
Before you change how you sign in, SSOGEN may ask you to confirm it is you in a box at the top of the page. To add your first second factor you need to have signed in within the last 5 minutes, or to type your password again (or select Sign in again, if your account is managed by your company’s other sign-in service). Once you have a second factor, changes need a second step instead. Details: My Account: password, Authenticator and passkeys.
Set up your phone
Section titled “Set up your phone”Do this now if your company allows it. It is the most useful single thing a new employee can do.
- Install the SSOGEN Authenticator app on your phone. The section shows store links if your administrator set them.
- In My Account, open Authenticator, in the SSOGEN Authenticator section.
- Select Pair a phone, scan the QR code with the app, type the code the app shows into Enter the code shown on your phone, and select Pair.
- The page says “Phone paired. It now shows your sign-in codes and approves sign-ins.” and lists your phone with Codes: on. From now on your phone can approve your sign-ins, and shows the codes SSOGEN asks for.
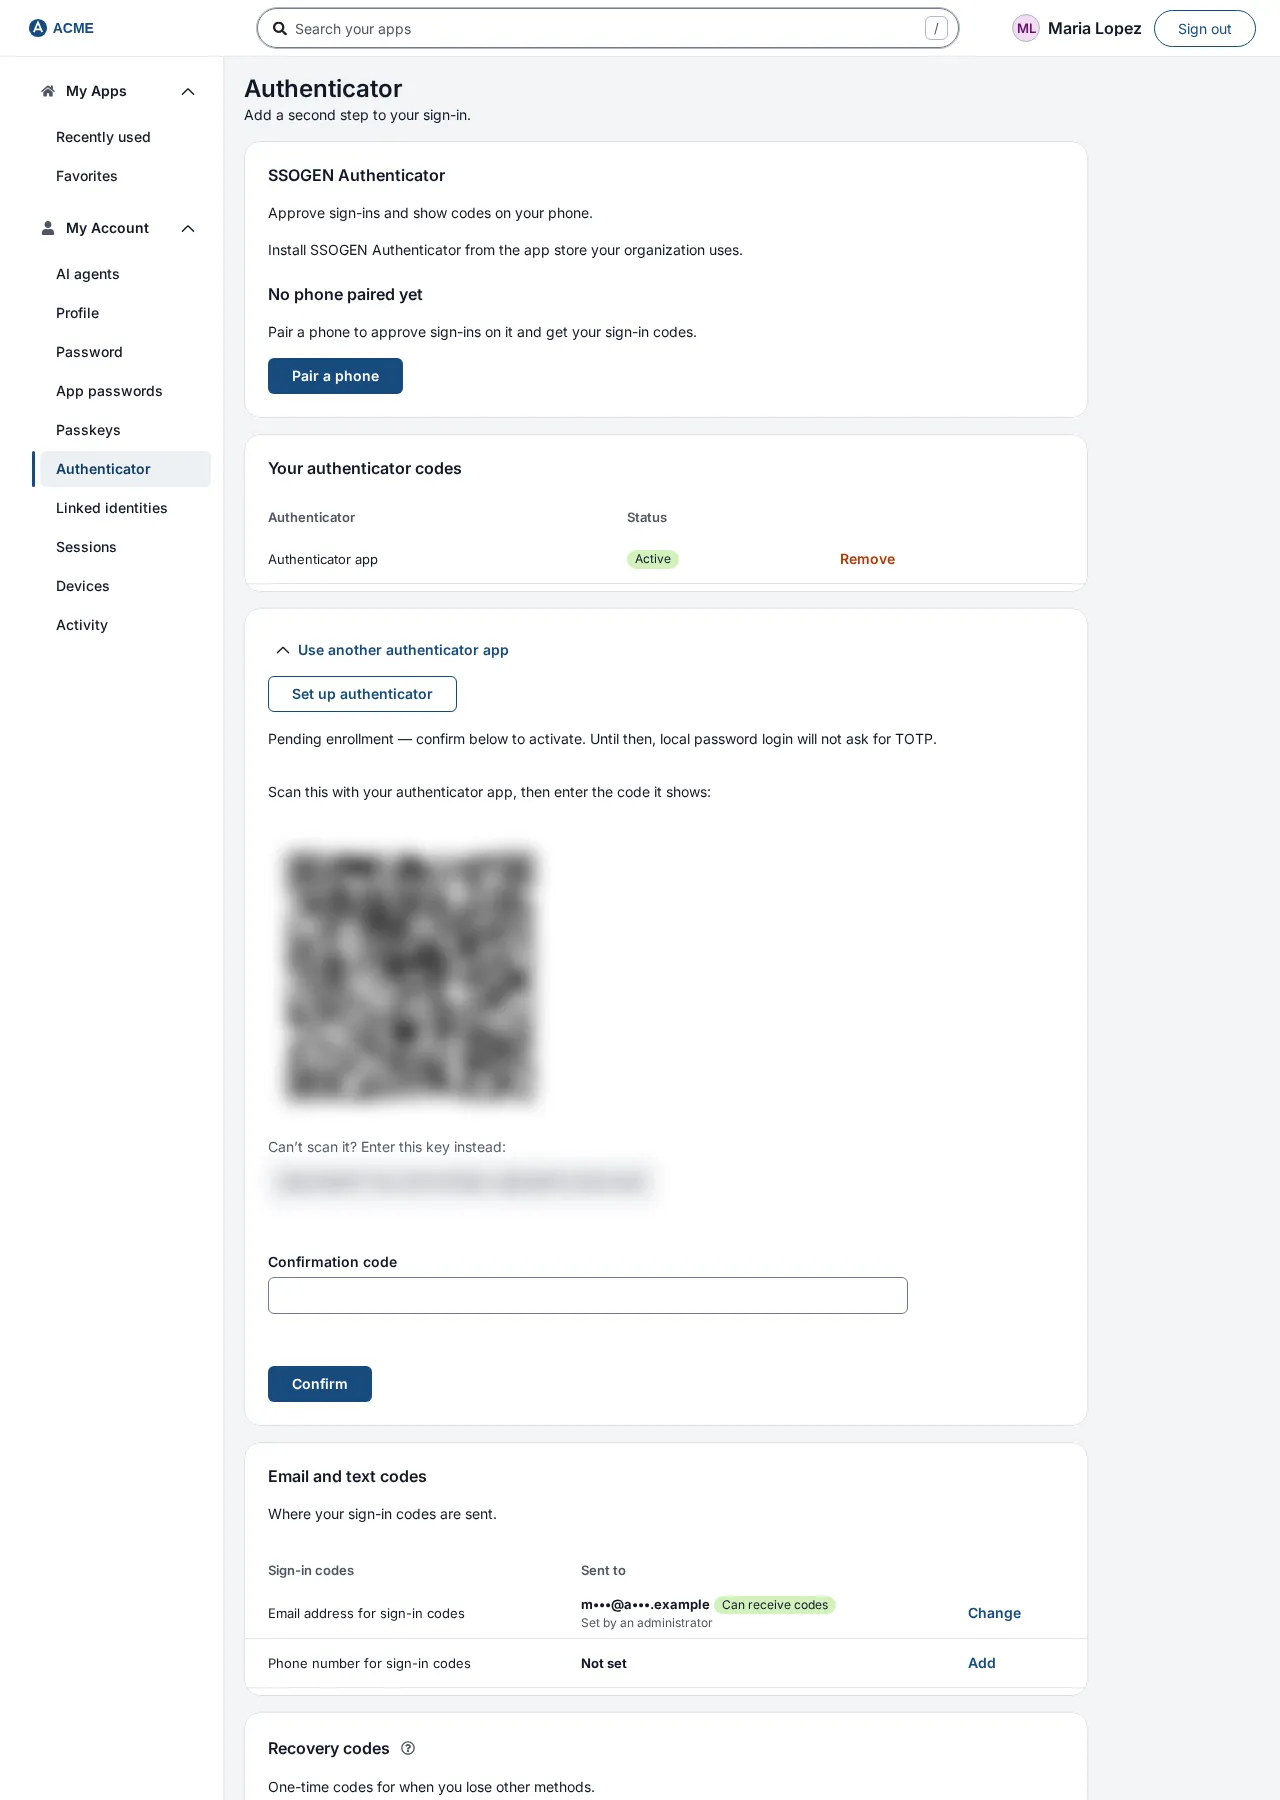
To use a different authenticator app instead, open Use another authenticator app (shown only when your organization allows other apps, which is not the default), select Set up authenticator, scan the QR code, and type the code it shows into Confirmation code.
To stop using the SSOGEN Authenticator, remove the phone: its codes go with it. To stop using another authenticator app, select Remove beside it under Your authenticator codes.
Save your recovery codes
Section titled “Save your recovery codes”On the Authenticator page, in the Recovery codes section, select Generate recovery codes and confirm with Generate new codes. The codes are shown once. Store them somewhere safe, away from your phone. Each code signs you in once if you lose your phone. Generating a new set replaces any codes you have not used.
Step 6. Sign out
Section titled “Step 6. Sign out”Select Sign out at the top right. You return to the sign-in page with the message “You have been signed out. Sign in again below when you are ready.”
If something goes wrong
Section titled “If something goes wrong”| What you see | What it means and what to do |
|---|---|
| “Your username or password is incorrect.” | One of them is wrong; SSOGEN does not say which. Retype both. |
| “Too many sign-in attempts. Wait a minute and try again.” | Too many tries in a short time. Wait a minute. |
| “Enter the username or email address you sign in with.” | The first screen needs your email address or username. |
| “No sign-in methods are available here. Contact your administrator.” | Your account or this place has no allowed way to sign in. Tell your administrator. |
| “Directory did not respond. Your password is fine. Try again.” | A problem on your company’s side. Try again later. |
| “Blocked by a browser security check. Reload and try again. If it persists, open sign-in from your organization’s SSOGEN address, not a bookmark.” | Open https://sso.acme.example/login/ typed in directly. |
| “That code didn’t work. Check it and try again.” | Use the newest code from the app. Check your phone’s clock is set automatically. |
| “Your sign-in took too long. Start again.” | Select Start again. |
| “Too many attempts. Try again in N minutes.” | The second step is locked briefly after repeated wrong codes. Wait, or use another method or a recovery code. |
| “You’ve asked for several codes. Wait a few minutes and try again.” | Wait before asking for another code. |
| “We can’t send codes right now. Use another method or contact your help desk.” | Email or text codes are unavailable. Use your authenticator app or a recovery code. |
| “Your identity was not verified. Try again.” | A general failure on the second step. Try again. |
| “Passkey sign-in failed. Check the username, or sign in another way.” | The passkey was refused, for example because it is not saved for that account. Check the username, or sign in another way. You can register a passkey in My Account, under Passkeys. |
| “No passkey was used. Try again and confirm with your PIN, fingerprint or face, or sign in another way.” | The passkey prompt was closed or not completed. Try again. |
Forgot your password
Section titled “Forgot your password”On the password screen, select Forgot password? (type your username first). SSOGEN says: “If that account can be reset here, a message is on its way. The link lasts fifteen minutes.” It says the same whether or not the account exists, so that nobody can use it to find out who has an account.
Open the email and follow the link. You see Choose a new password. Type a new password in New password, select Set password, and you see “Your password has been changed, and every session you had has been signed out.” Then sign in with the new password. If the link says it has expired or has already been used, ask for a new one from the sign-in page.
If your password is kept in your company directory, SSOGEN cannot change it there. In that case the message is “Your directory did not accept the new password. Reset it the way you normally do.”
Lost your phone
Section titled “Lost your phone”At the second step, use a Recovery code, or, if your organization allows it, Lost your phone? and Use an email code and a text code. If you have neither, ask your administrator to reset your second step: an administrator who can manage users has a Reset MFA action on your user record. After the reset you sign in and set up an authenticator again.